Product model: Hiwonder ROSOrin ROS2 Smart Car (Mecanum wheel configuration)
SKU or kit name:
Purchase channel: Hiwonder website
Controller board: Jetson Orin NX (customer-supplied, not the kit-included board) + STM32
Software and Environment
Operating system: Hiwonder-provided Jetson image (re-flashed to SD card)
Connection method: WiFi (not currently connecting — no blue LED activity)
Software version:
Firmware version:
Image version: ROSorin_NX_202060604
Tutorial step: Jetson-to-STM32 wiring step (followed Jetson Nano tutorial instead of Orin NX-specific instructions due to missing 3-pin to DC cable)
Issue Description
What did you expect to happen? After flashing the SD card with the Hiwonder image and powering on the robot, expected the Jetson to boot, connect to WiFi, and the blue LED to blink to indicate normal startup.
What actually happened? Robot powers on and shows over 10V charge, but the Jetson does not appear to boot or respond, the blue LED does not blink, and no WiFi network is produced. Pressing the Key 1 button did not resolve it.
Error message or logs:
Reproduction Steps
Flash SD card with Hiwonder-provided image for Jetson Orin NX.
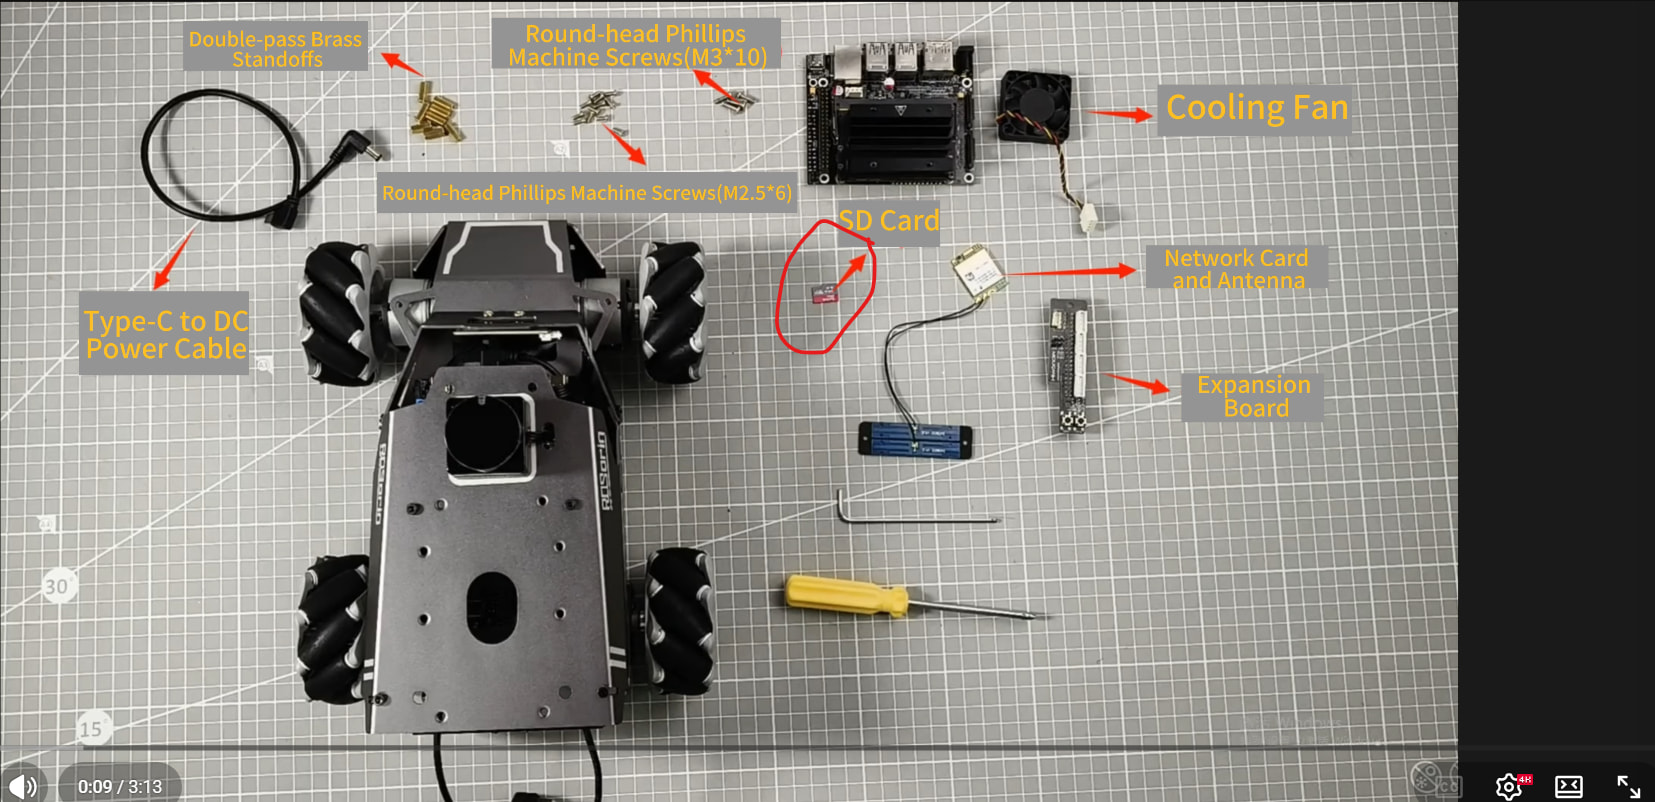
Mount WiFi card, antenna, and expansion board following the Jetson Orin Nano tutorial. The only deviation from that tutorial was the power cable, since the 3-pin to DC barrel power cable was not available; instead wired the Jetson-to-STM32 connection following the Jetson Nano tutorial.
Power on robot and observe Jetson/WiFi/LED status.
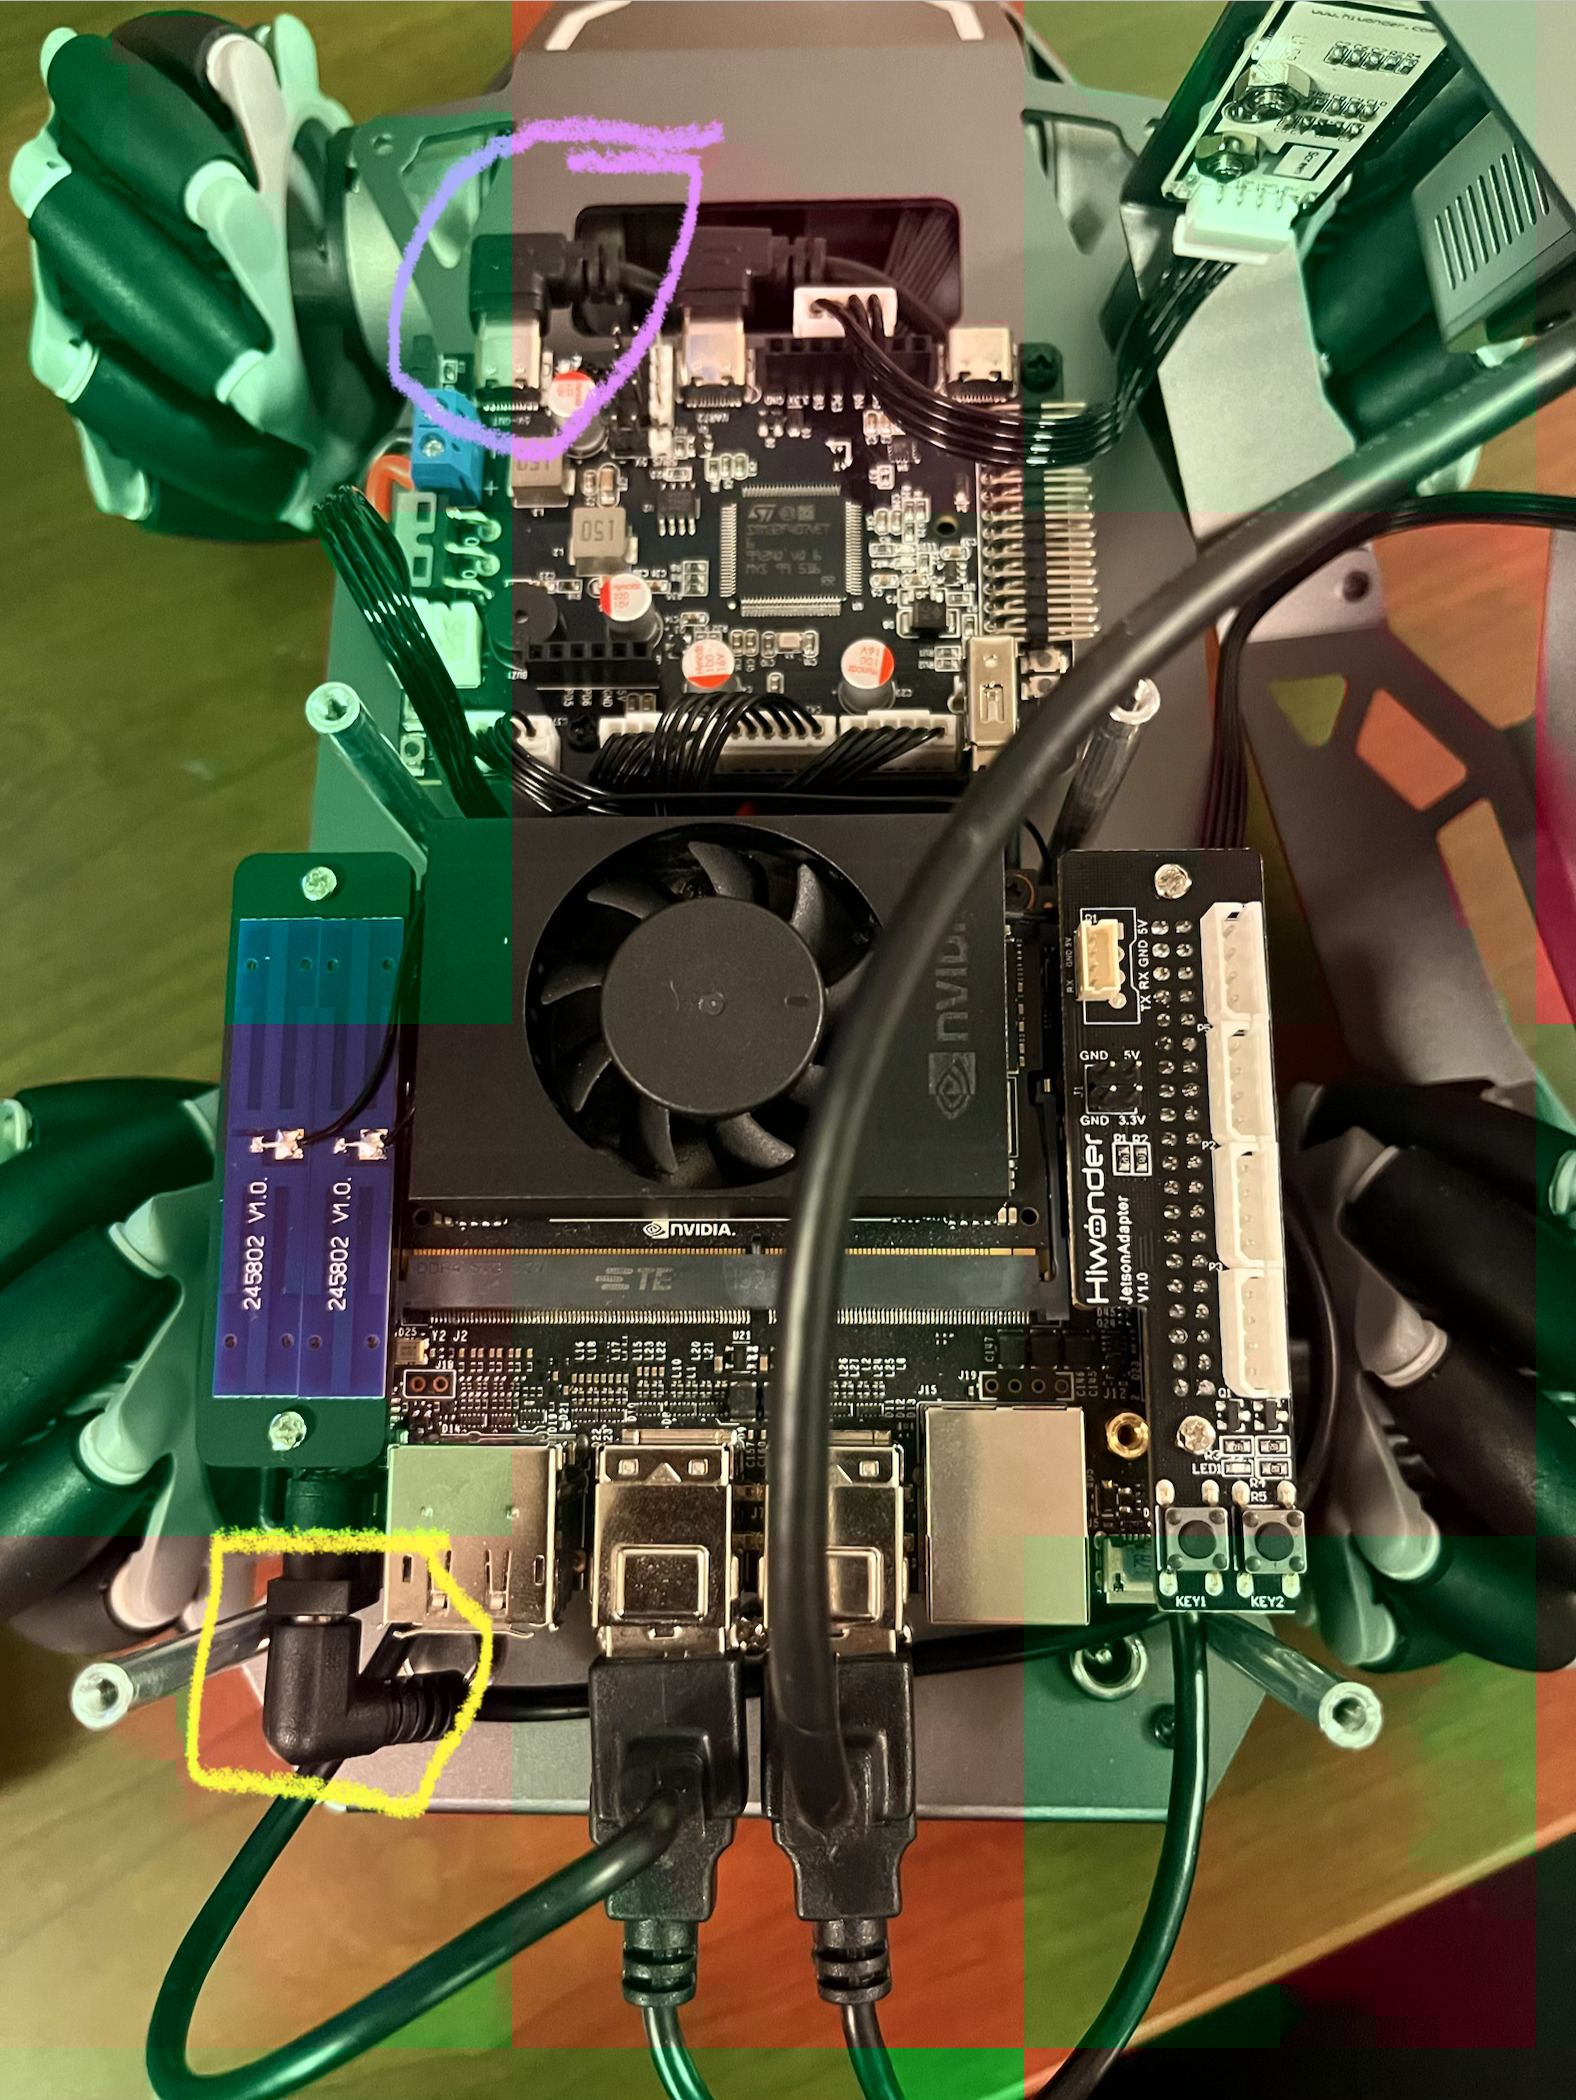
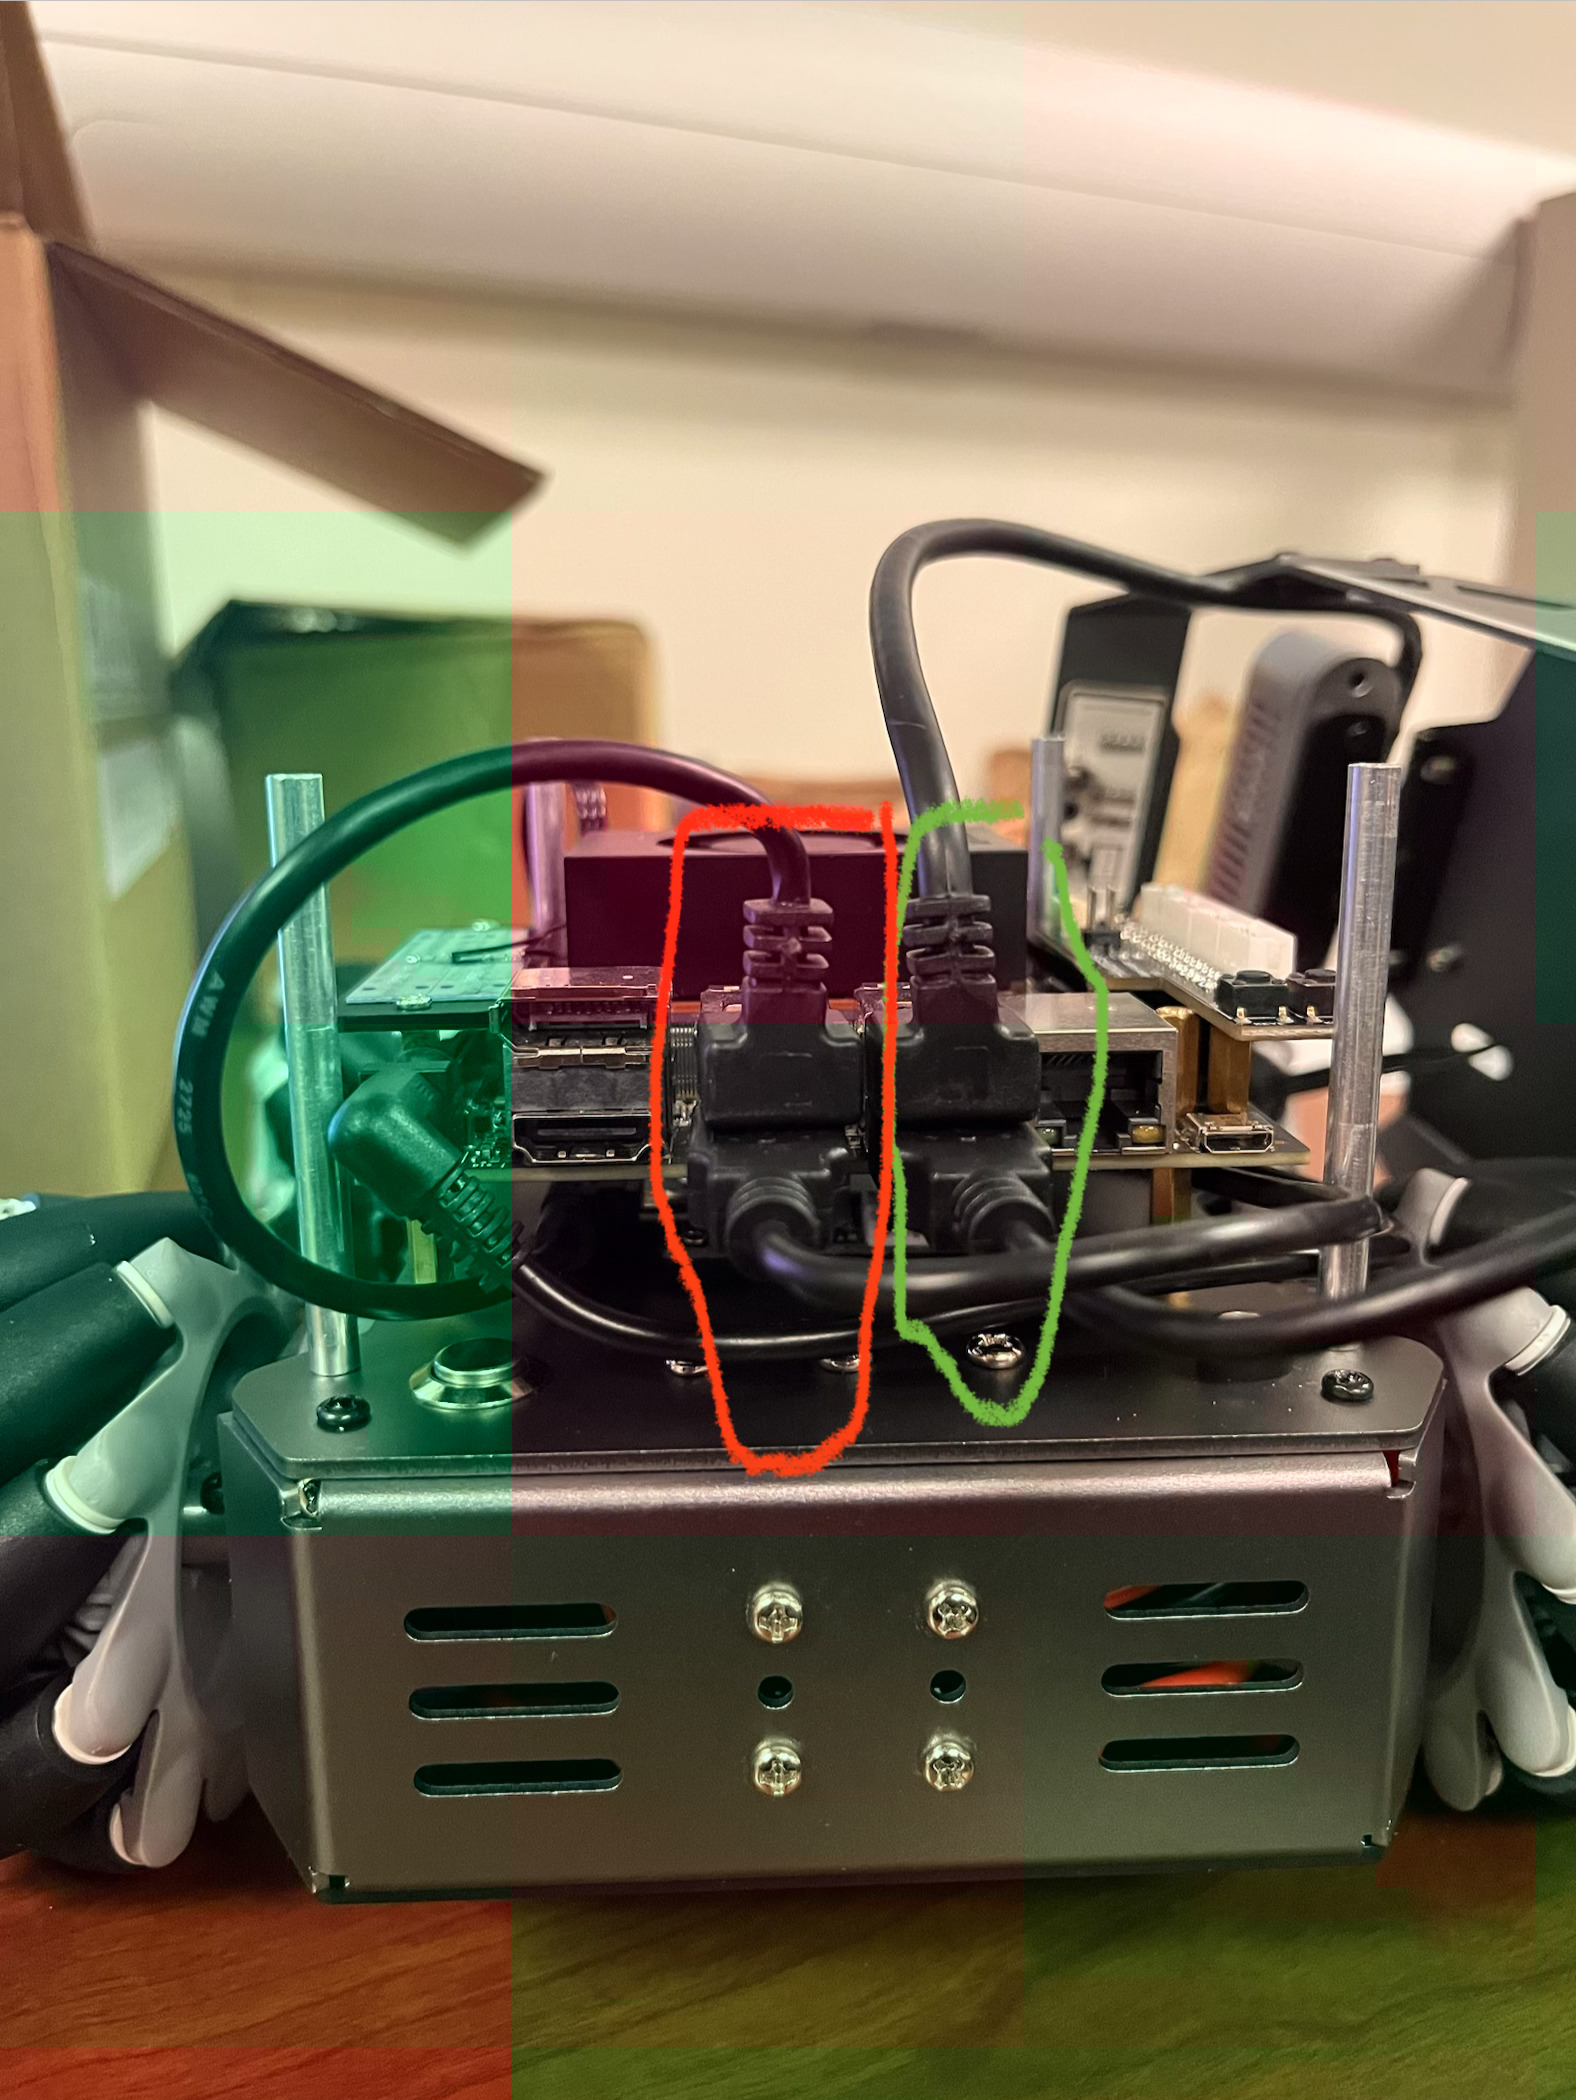
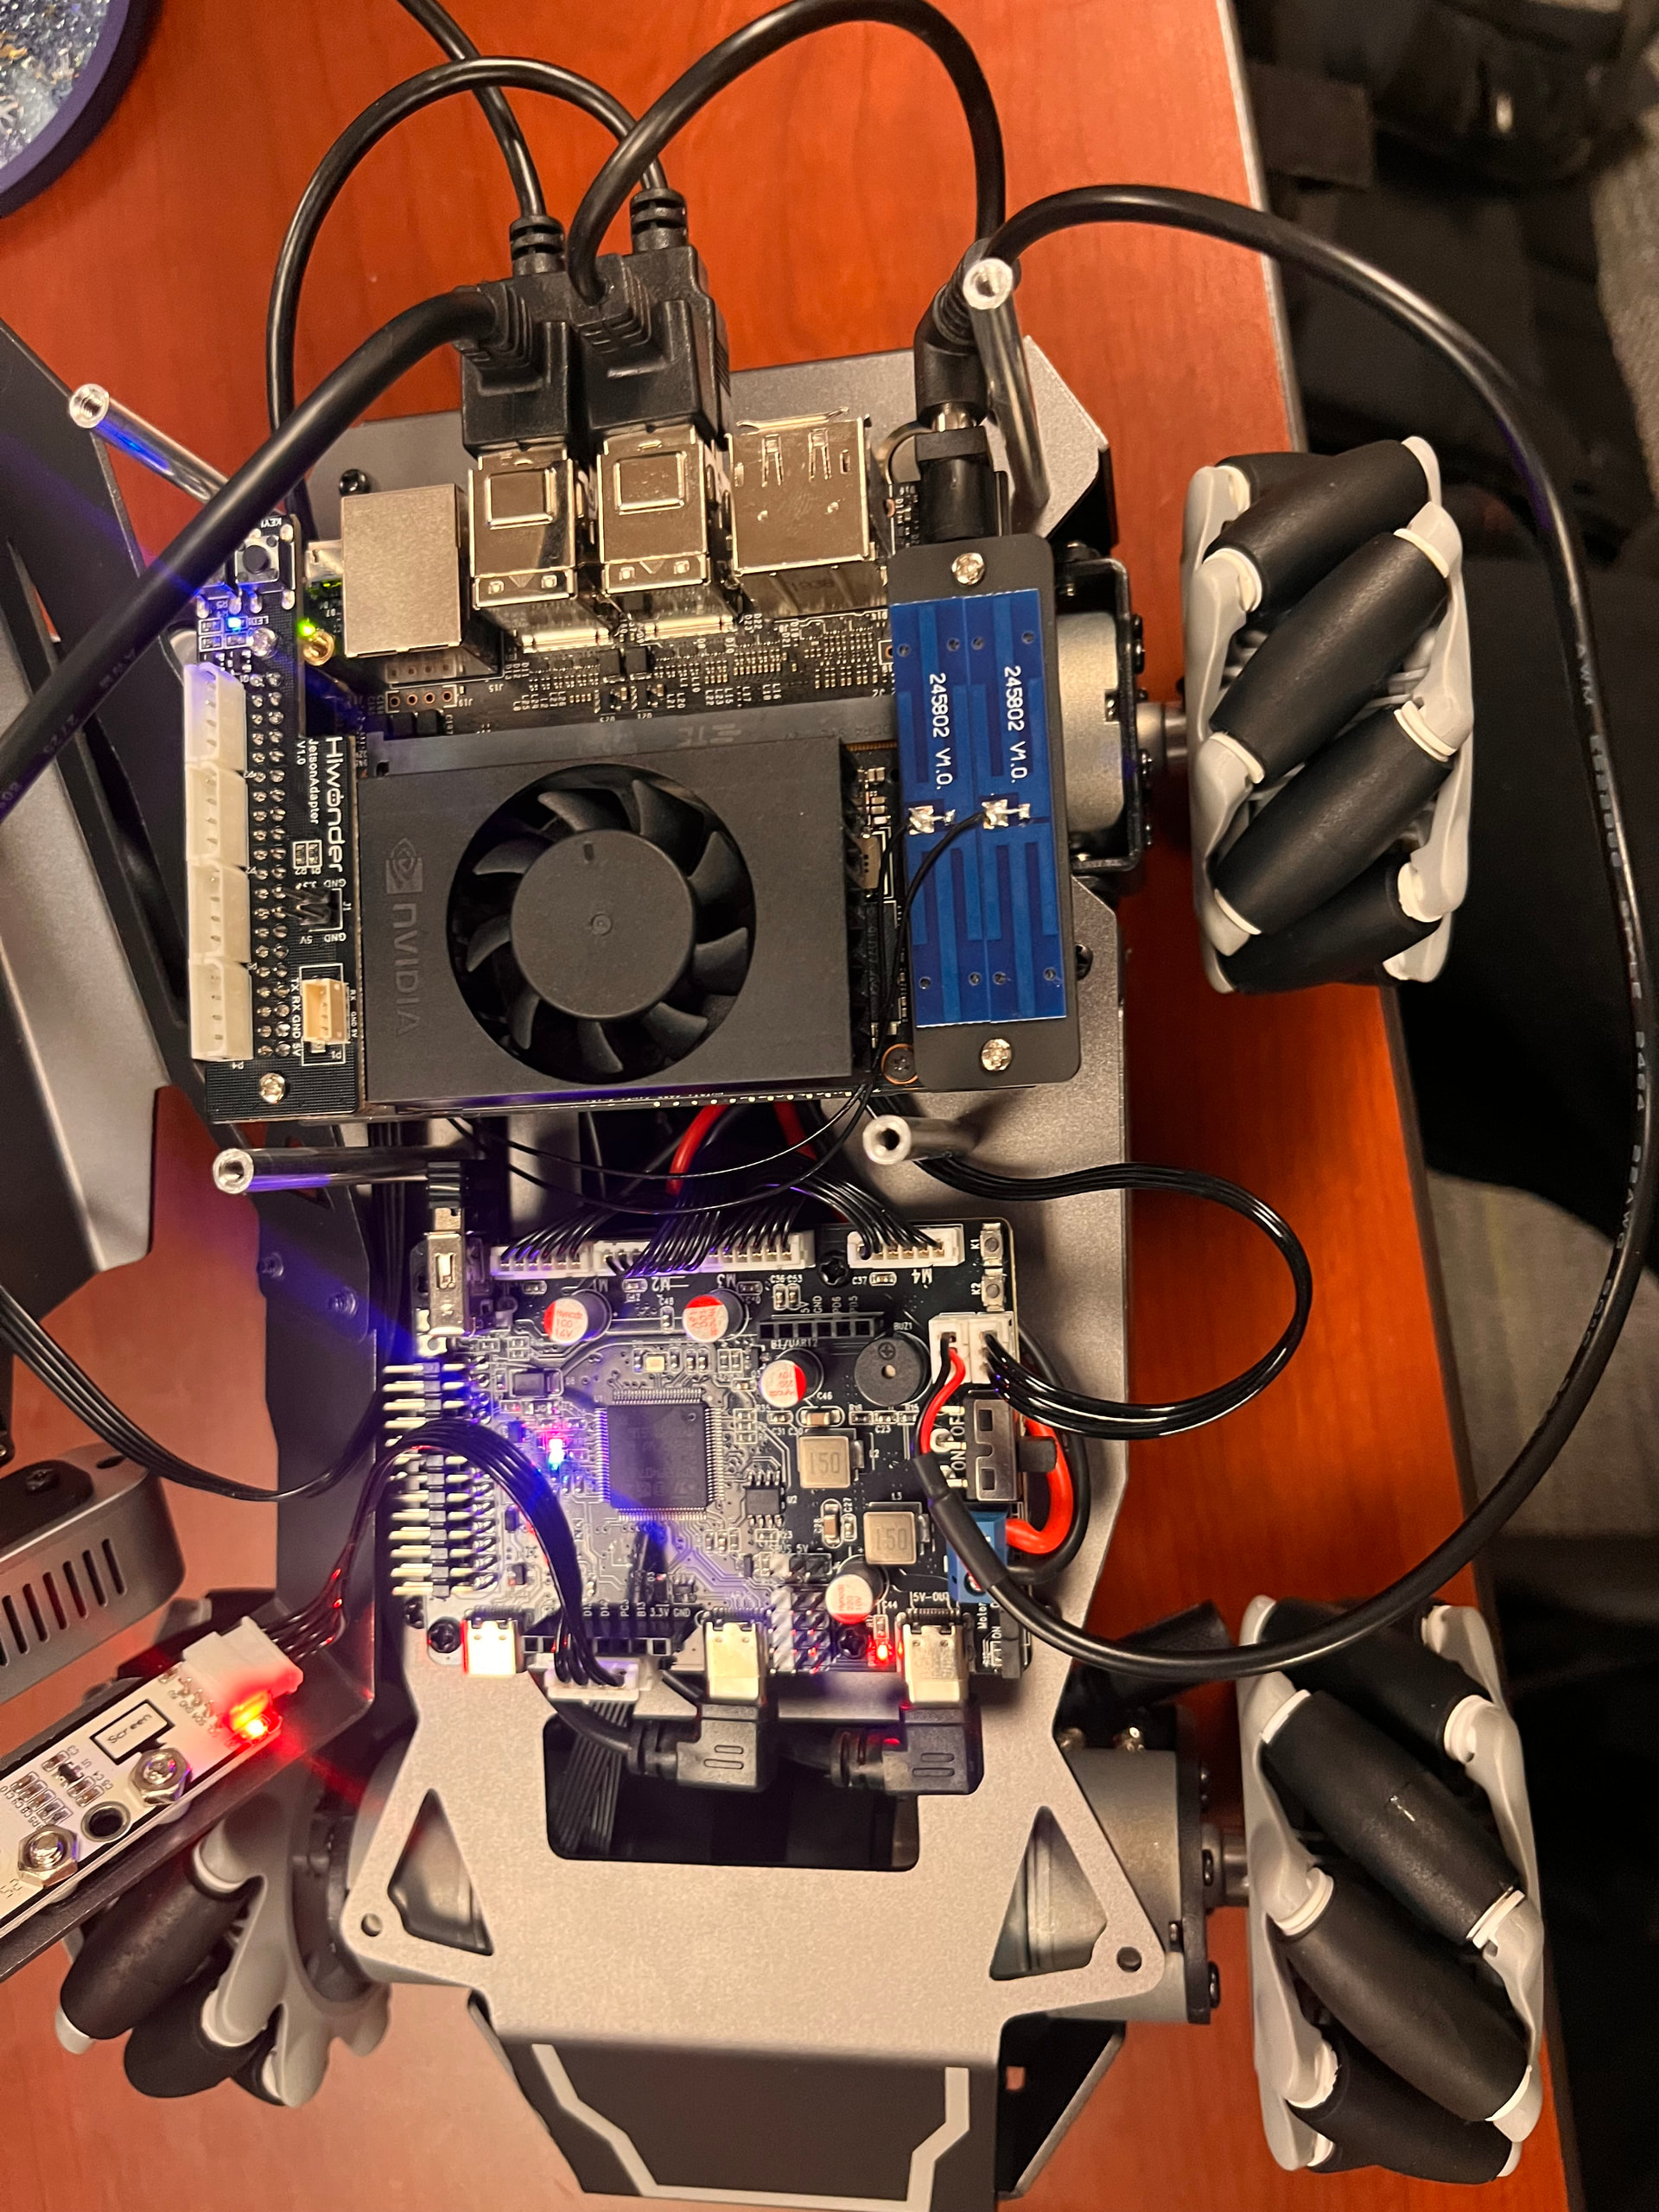
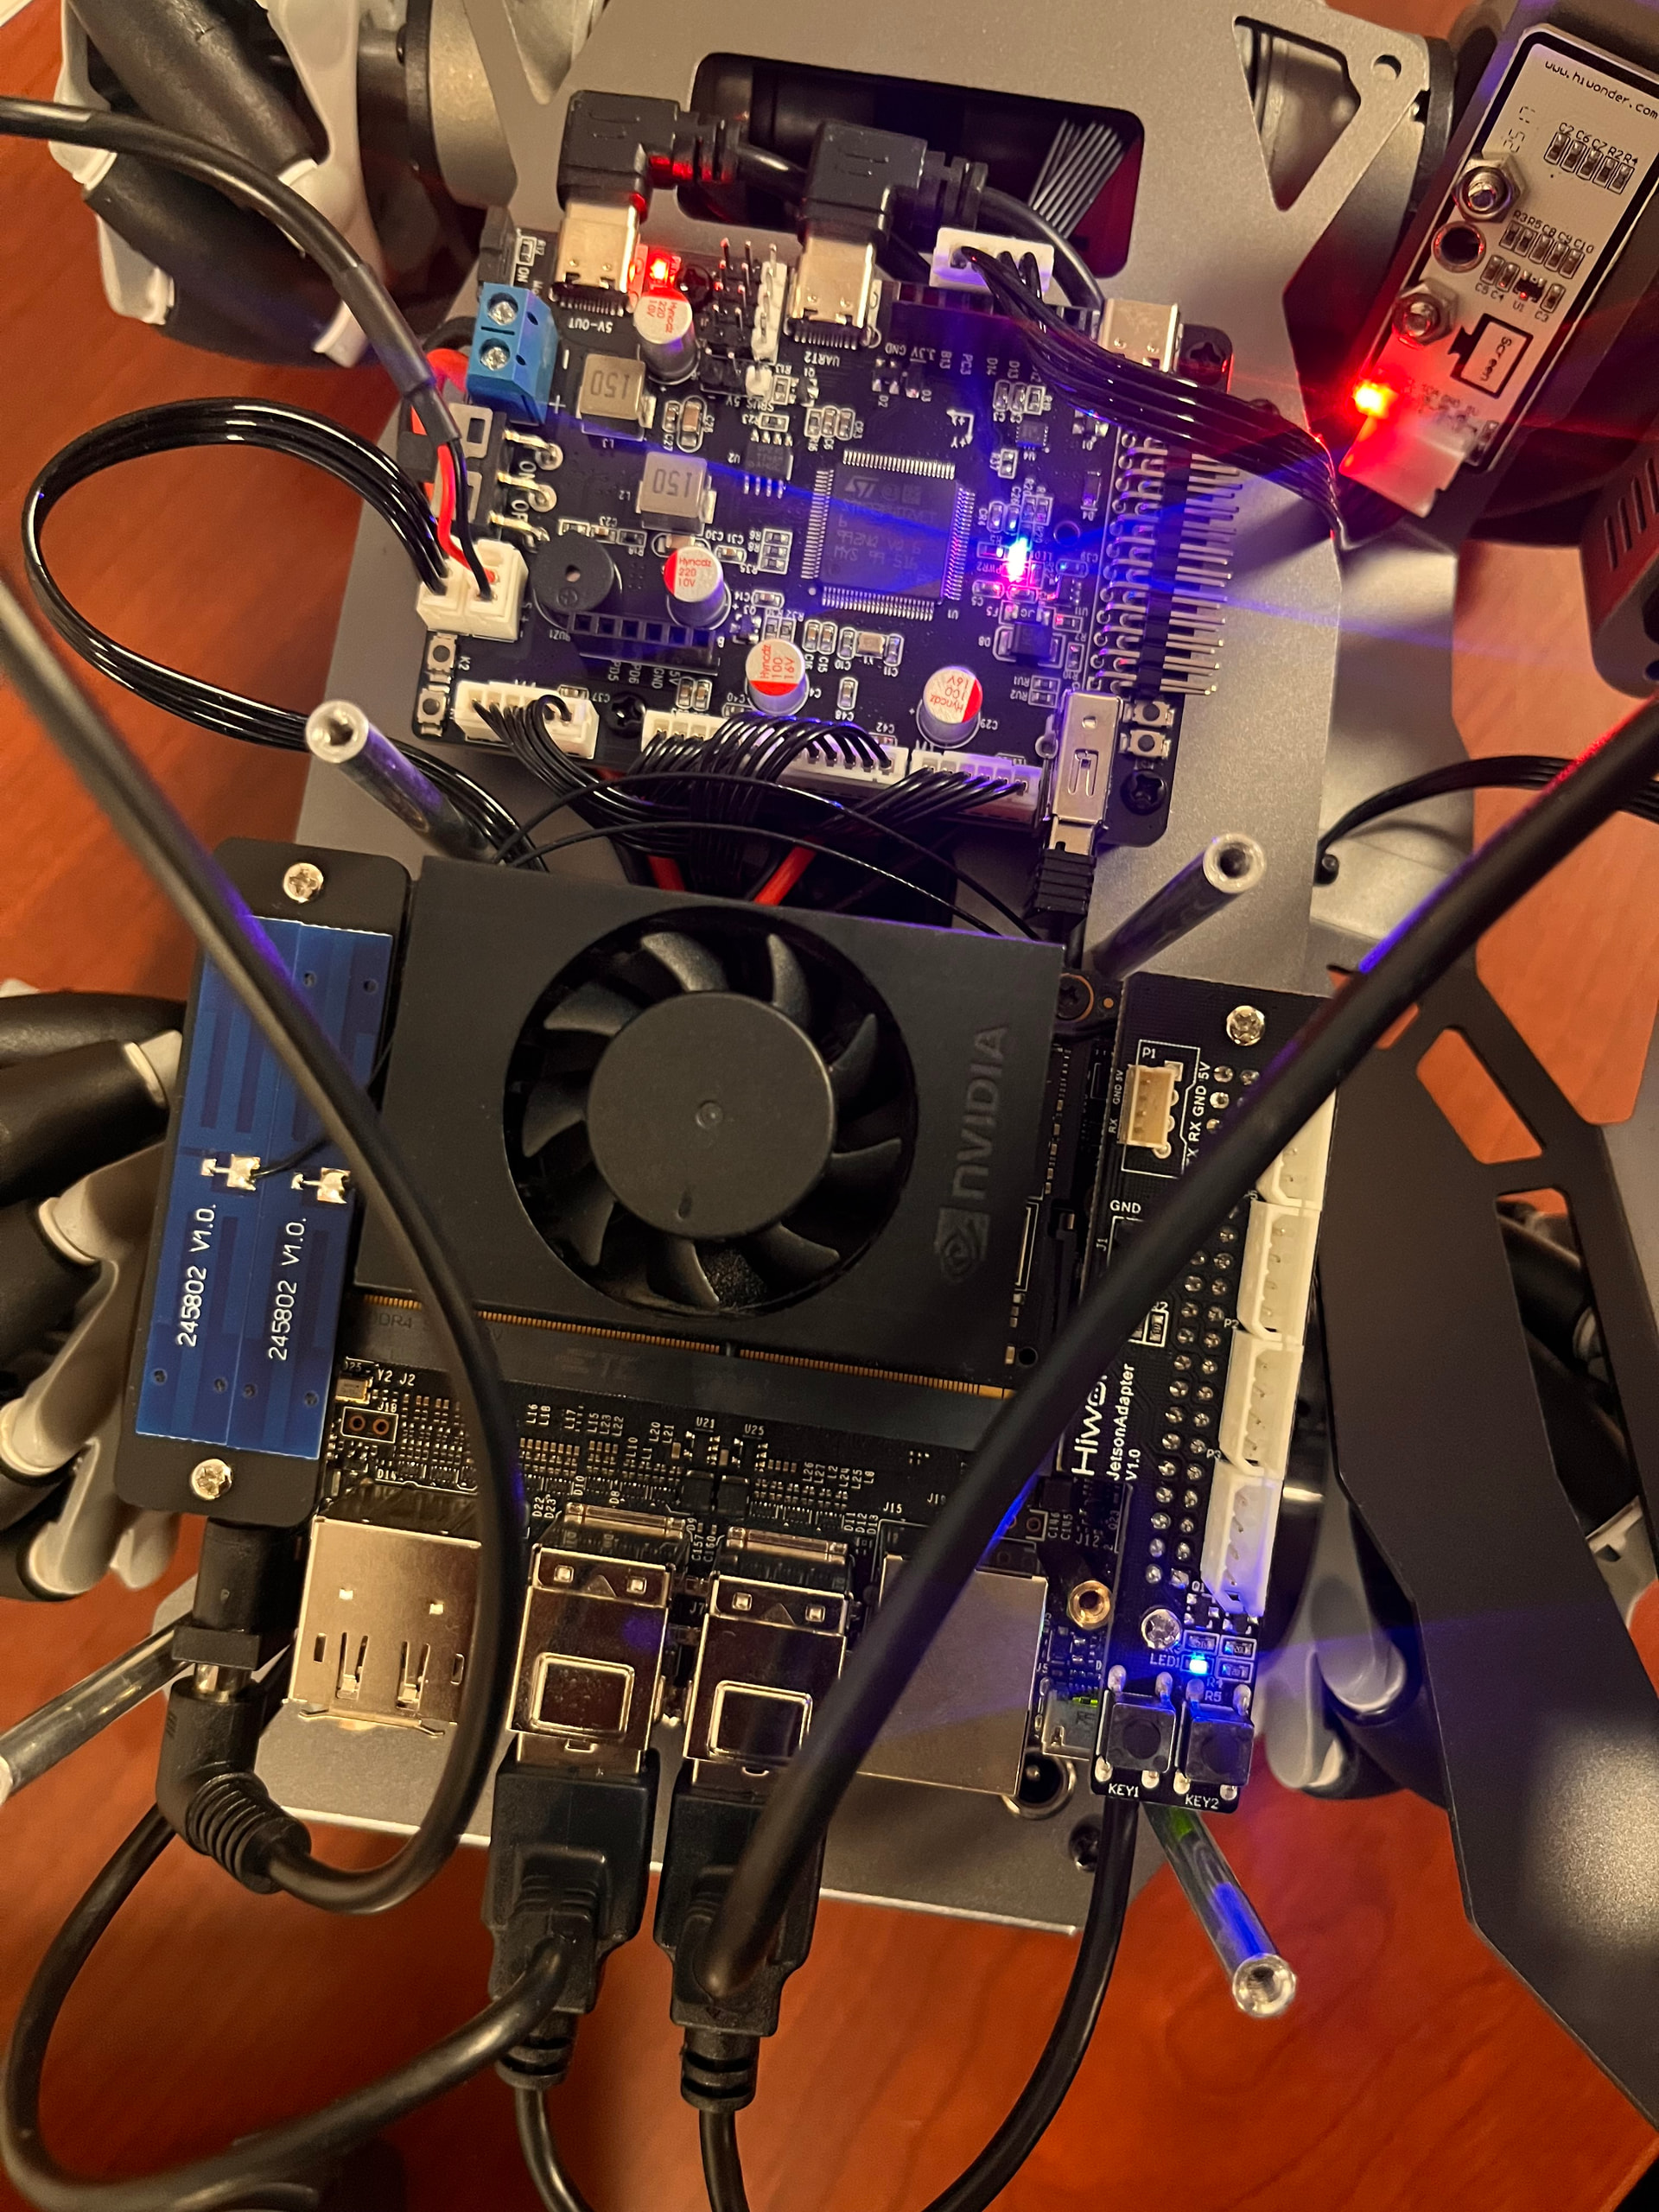
Wiring Detail (as photographed)
Purple circle: STM32 connection point.
Yellow circle: wire from the STM32 connection running to the Jetson’s power input.
Green circle: connection point for the 3D depth camera and WonderEcho Pro.
Red circle: connection to the controller located underneath the Jetson.
Reflashed SD card with Hiwonder image for Orin NX. Mounted WiFi card, antenna, and expansion board per the Orin Nano tutorial, with the only deviation being the power cable due to the missing 3-pin to DC barrel cable — wired Jetson-to-STM32 per the Jetson Nano tutorial instead. Verified battery charge (10V+). Pressed Key 1 button. Contacted Hiwonder support, who identified the missing 3-pin to DC cable as a likely cause; replacement cable requested and pending.
Urgency
Is this for a class, competition, or deadline? Yes — needed for research and an upcoming paper deadline.
The WiFi symptom should be checked only after the Jetson power path is corrected. The ROSOrin guide has separate wiring layouts for Jetson Nano and Jetson Orin Nano/Orin NX, so the Jetson Nano power wiring should not be used as a substitute.
Power the robot off and stop using the temporary Jetson Nano wiring.
When the replacement 3-pin-to-DC cable arrives, connect the Jetson exactly as shown in the ROSOrin Jetson OrinNano/OrinNX wiring diagram. Do not improvise the power connection, and do not connect the battery charger directly to the Jetson DC input.
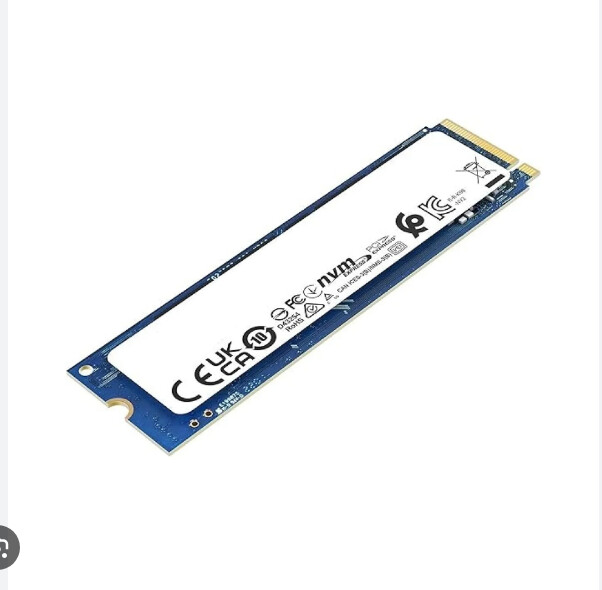
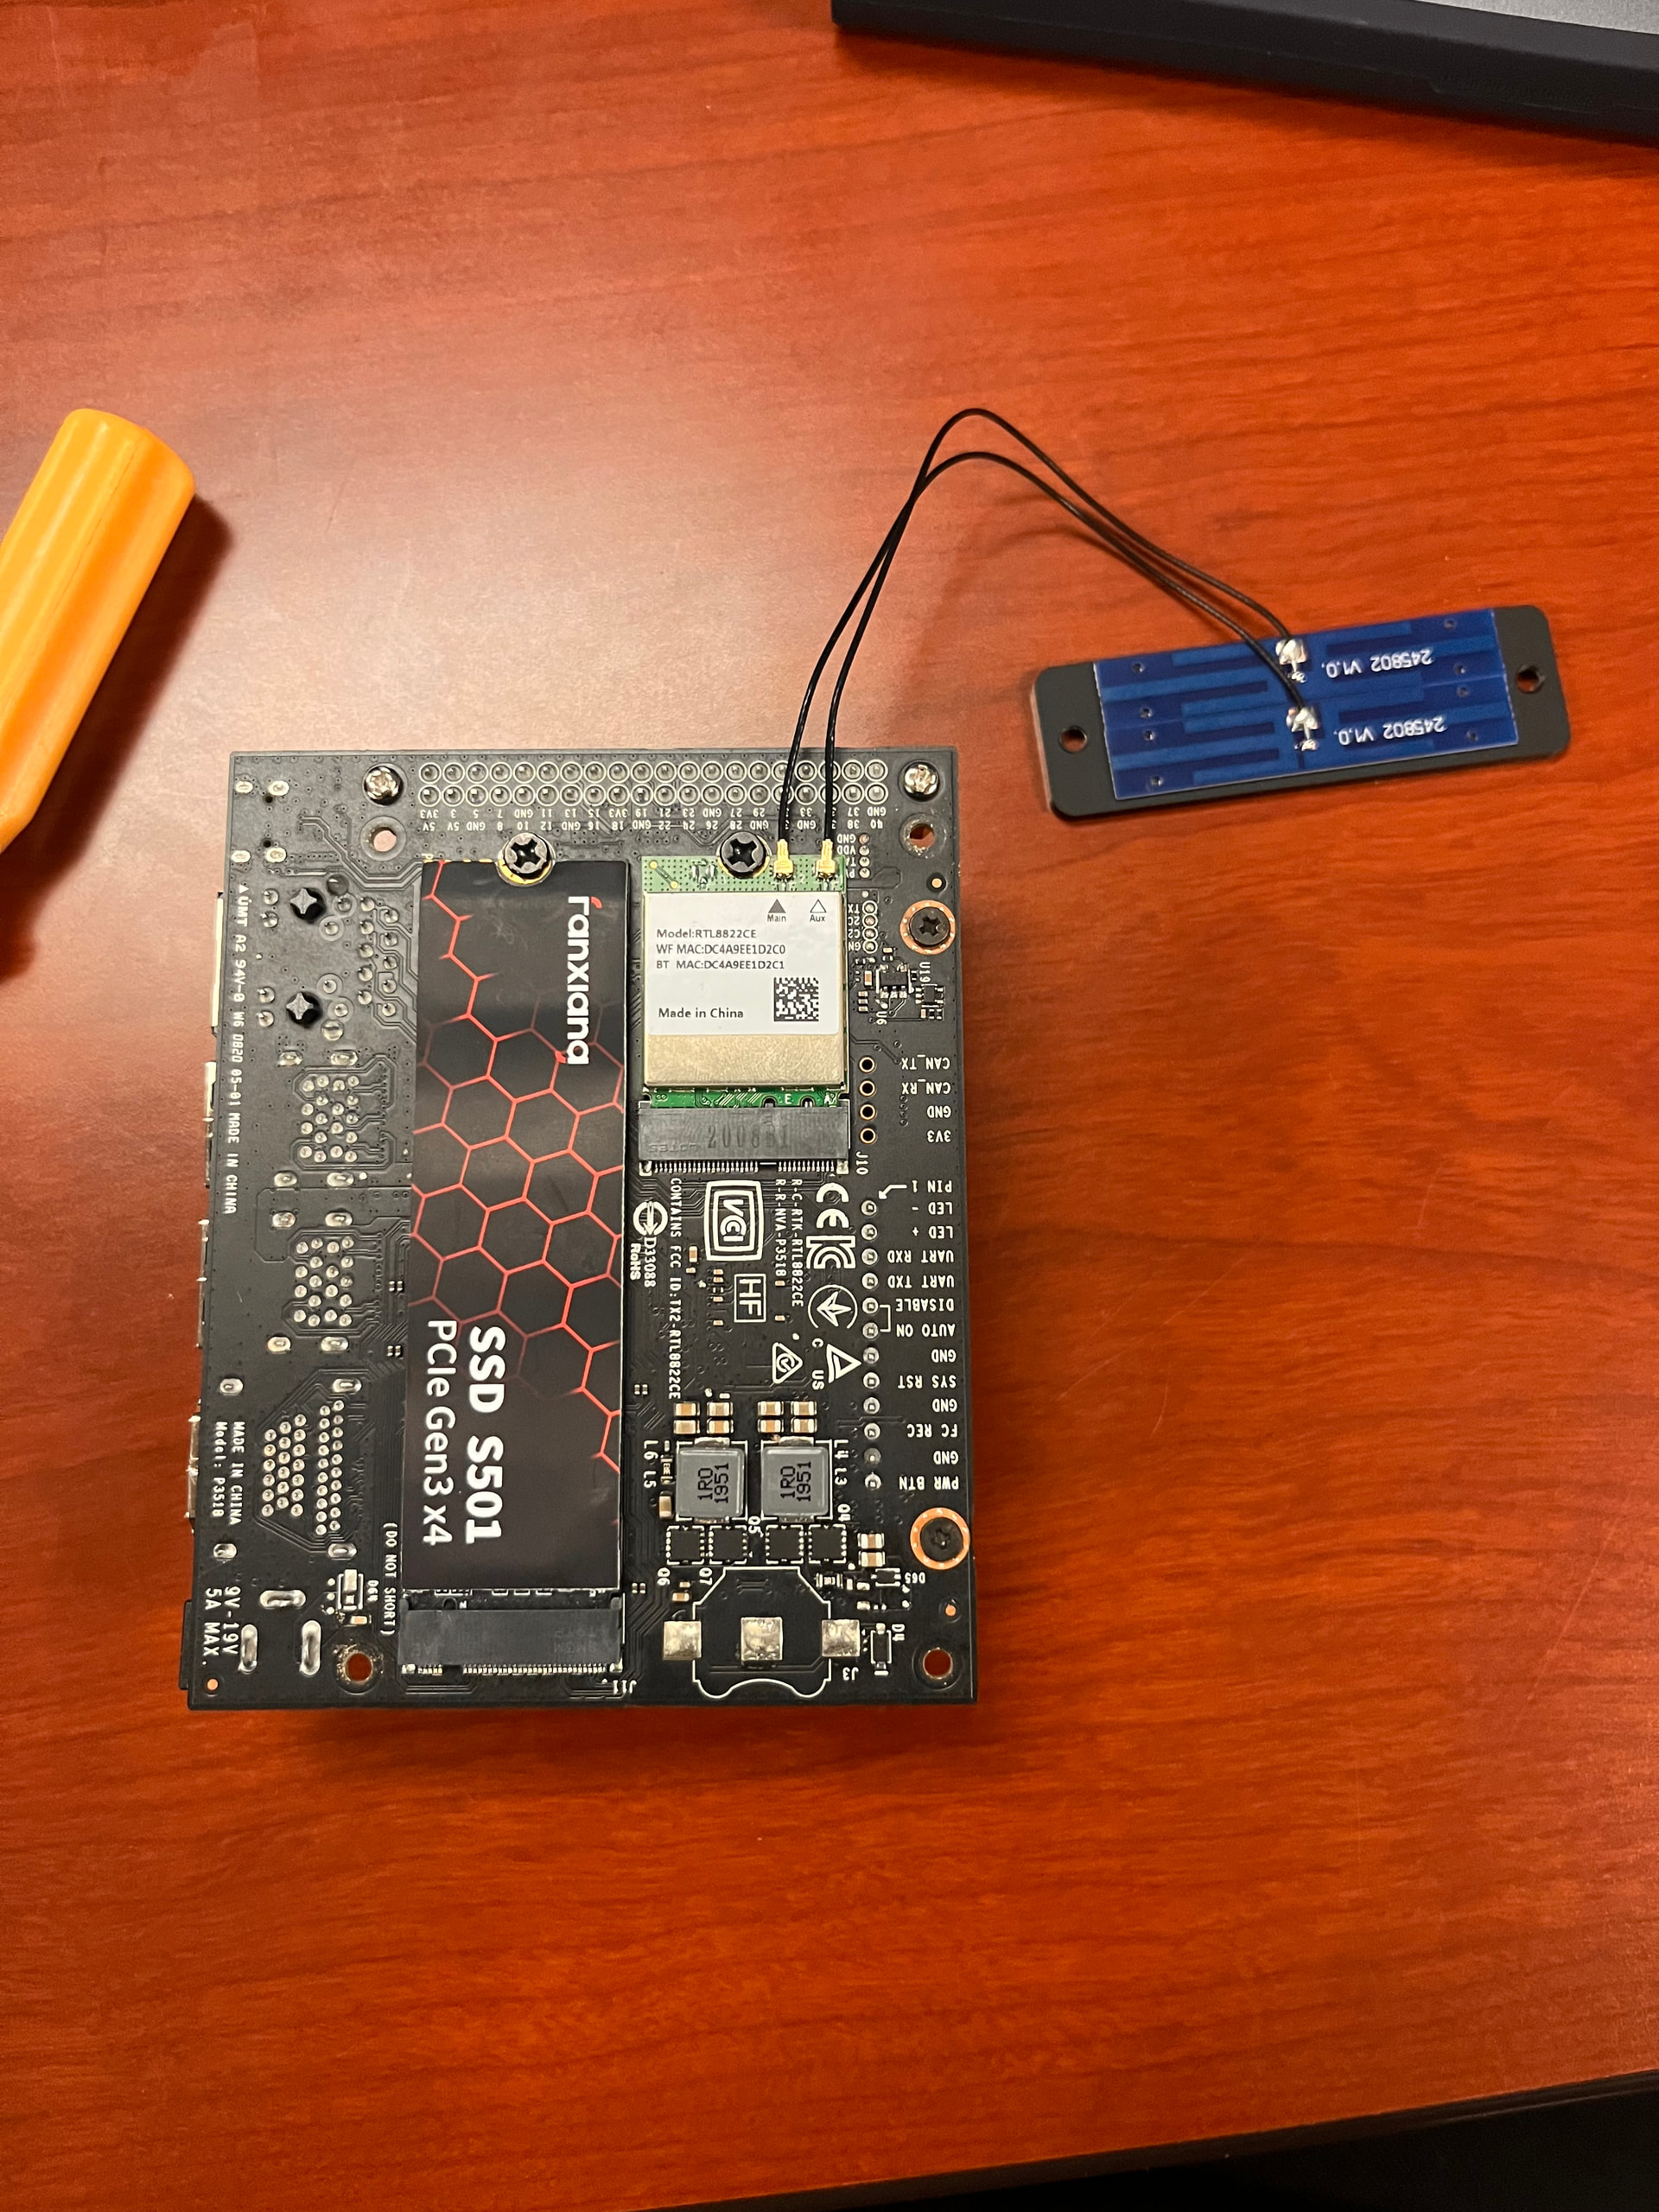
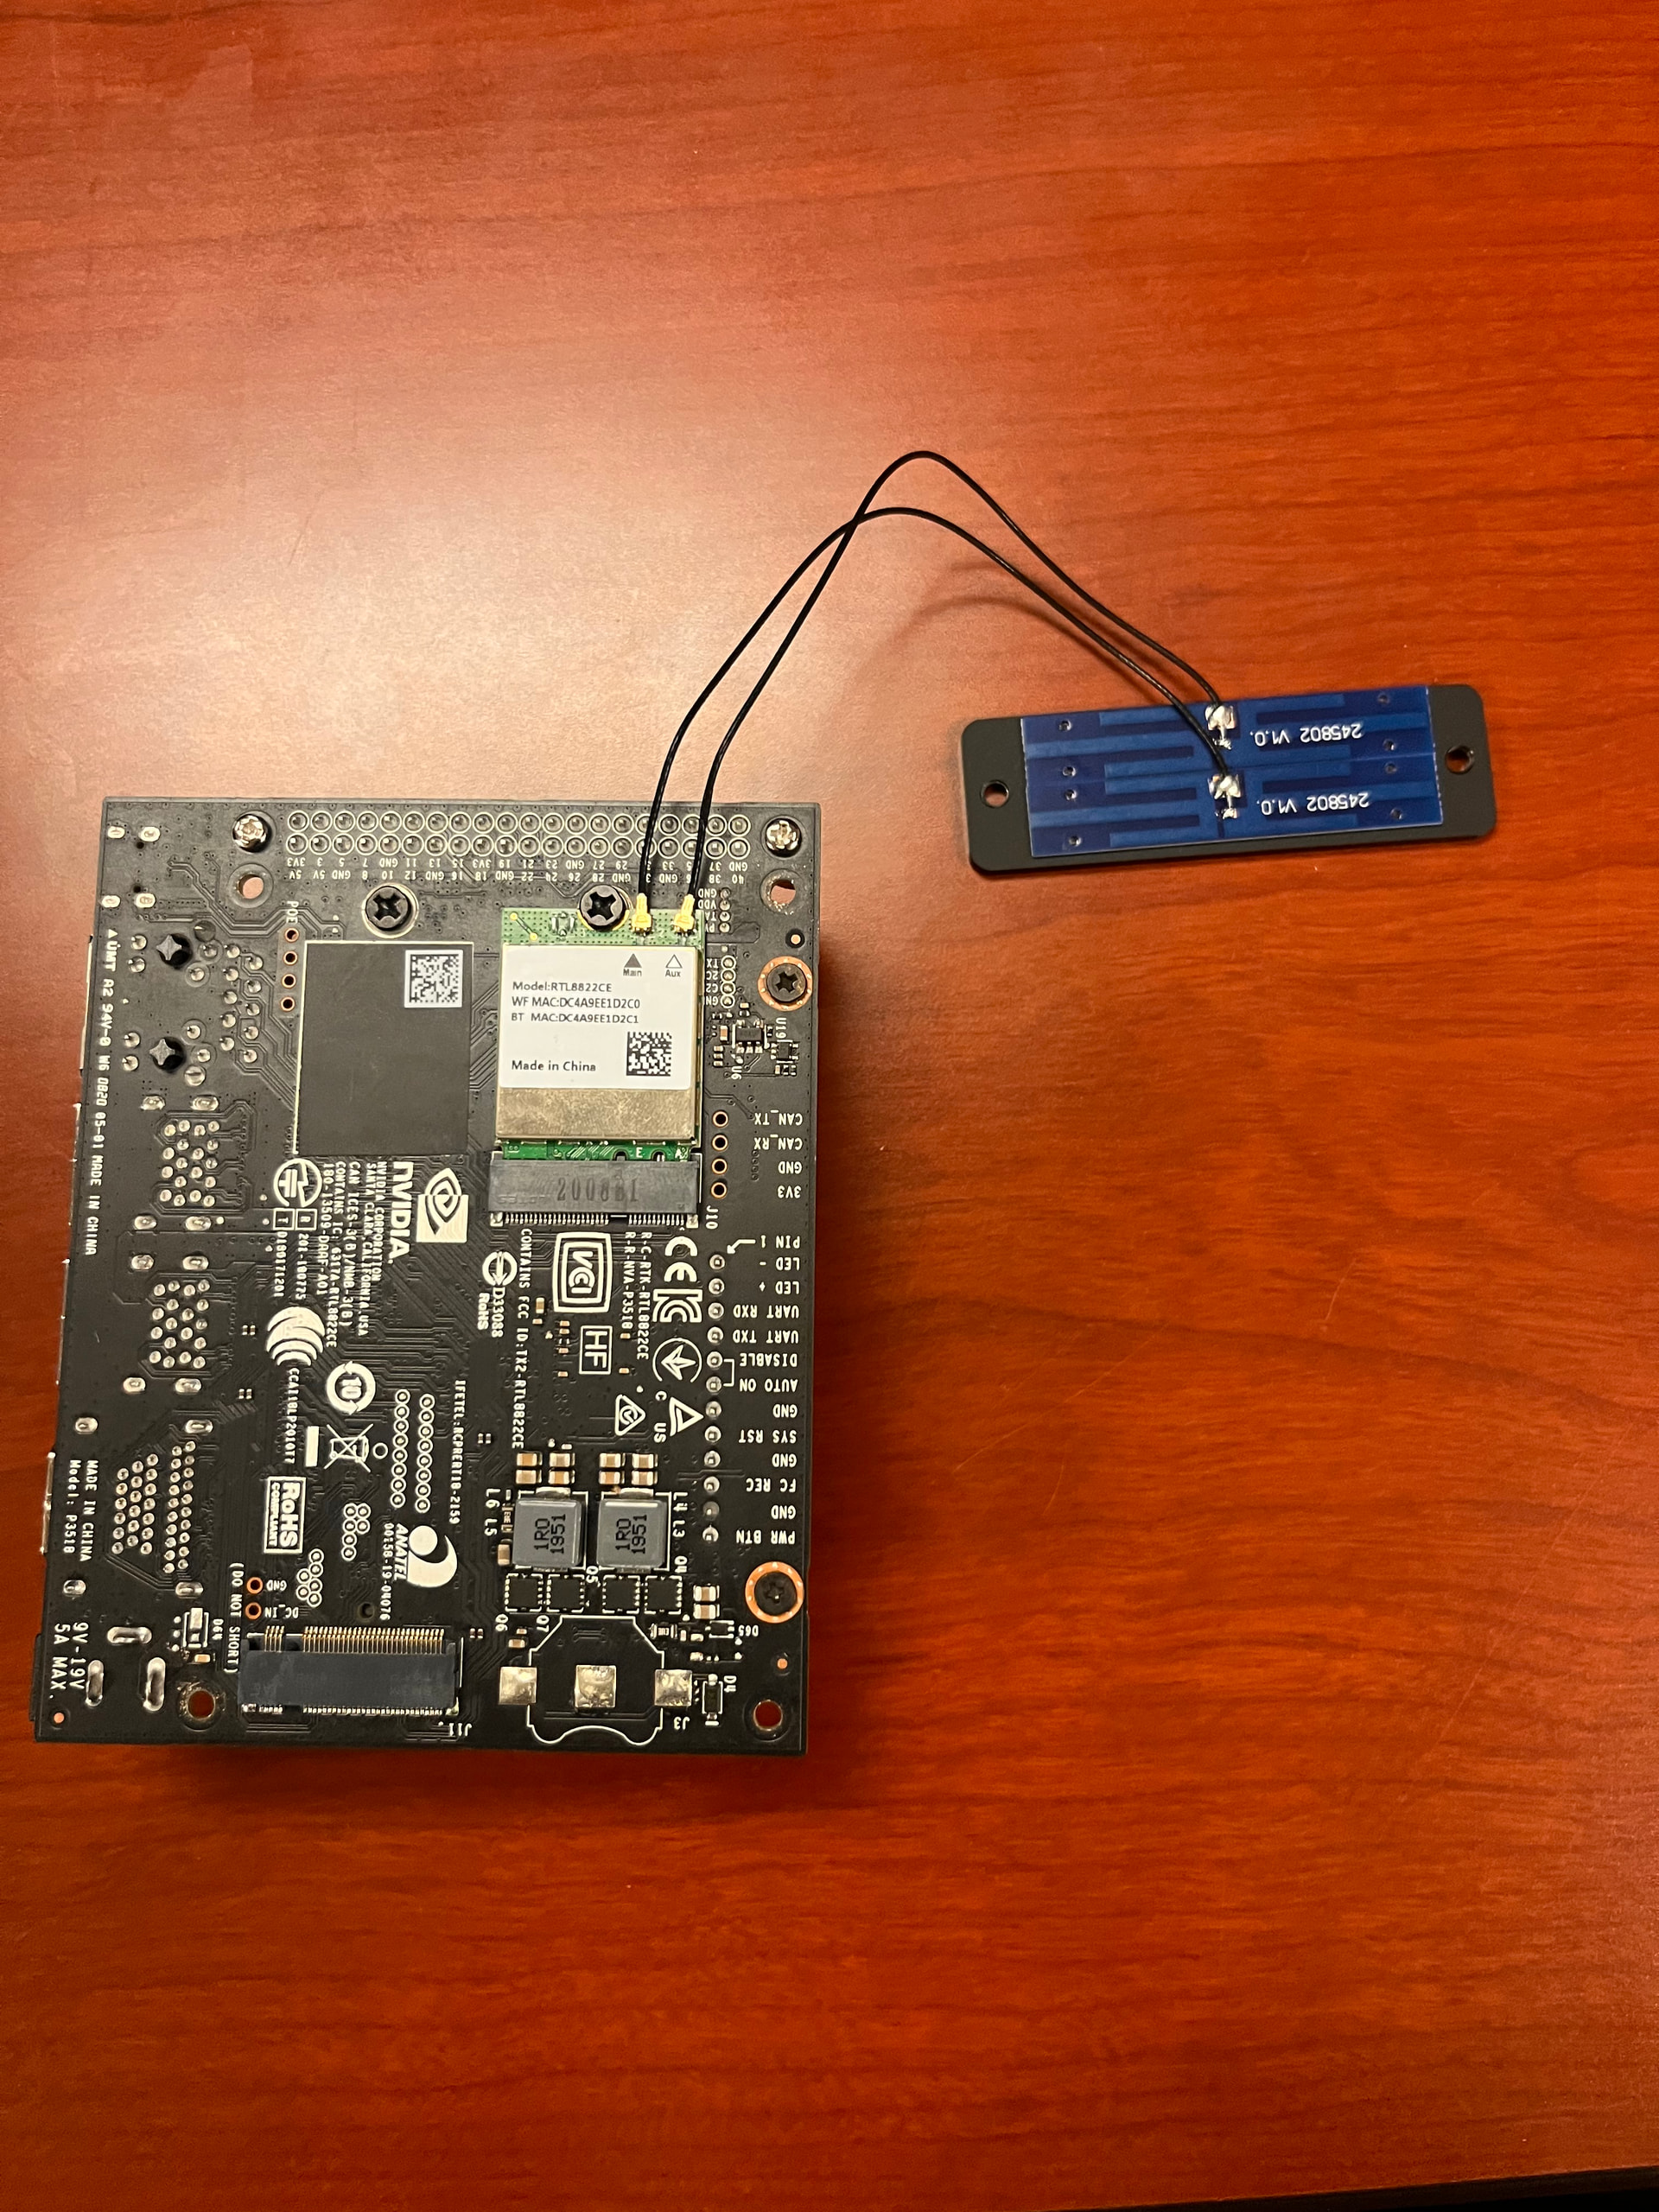
Confirm that the Orin NX image was written to the NVMe solid-state drive and that the drive is firmly installed. The Orin NX startup guide boots the Hiwonder image from the installed SSD, so please clarify whether “SD card” in the post actually means the NVMe SSD.
Power on and observe the Jetson carrier’s power indicator and the ROSOrin expansion-board LED1 separately. During normal ROSOrin startup, LED1 flashes, and a short buzzer sound indicates startup completion. An HW hotspot should then appear with the password hiwonder.
Use KEY1 only if LED1 is blue and steady: hold it for 5–10 seconds. If LED1 starts flashing, AP mode should produce the HW hotspot.
If the Jetson power indicator remains off after the correct cable is fitted, turn the robot off and provide clear close-up photos of both ends of the new power cable and all power connections. If Jetson power is present but LED1 never lights, also confirm the exact storage type and complete image filename. Avoid further reflashing until the power connection and boot storage are confirmed.
If this reply was helpful, you can mark it as the solution using the button below.
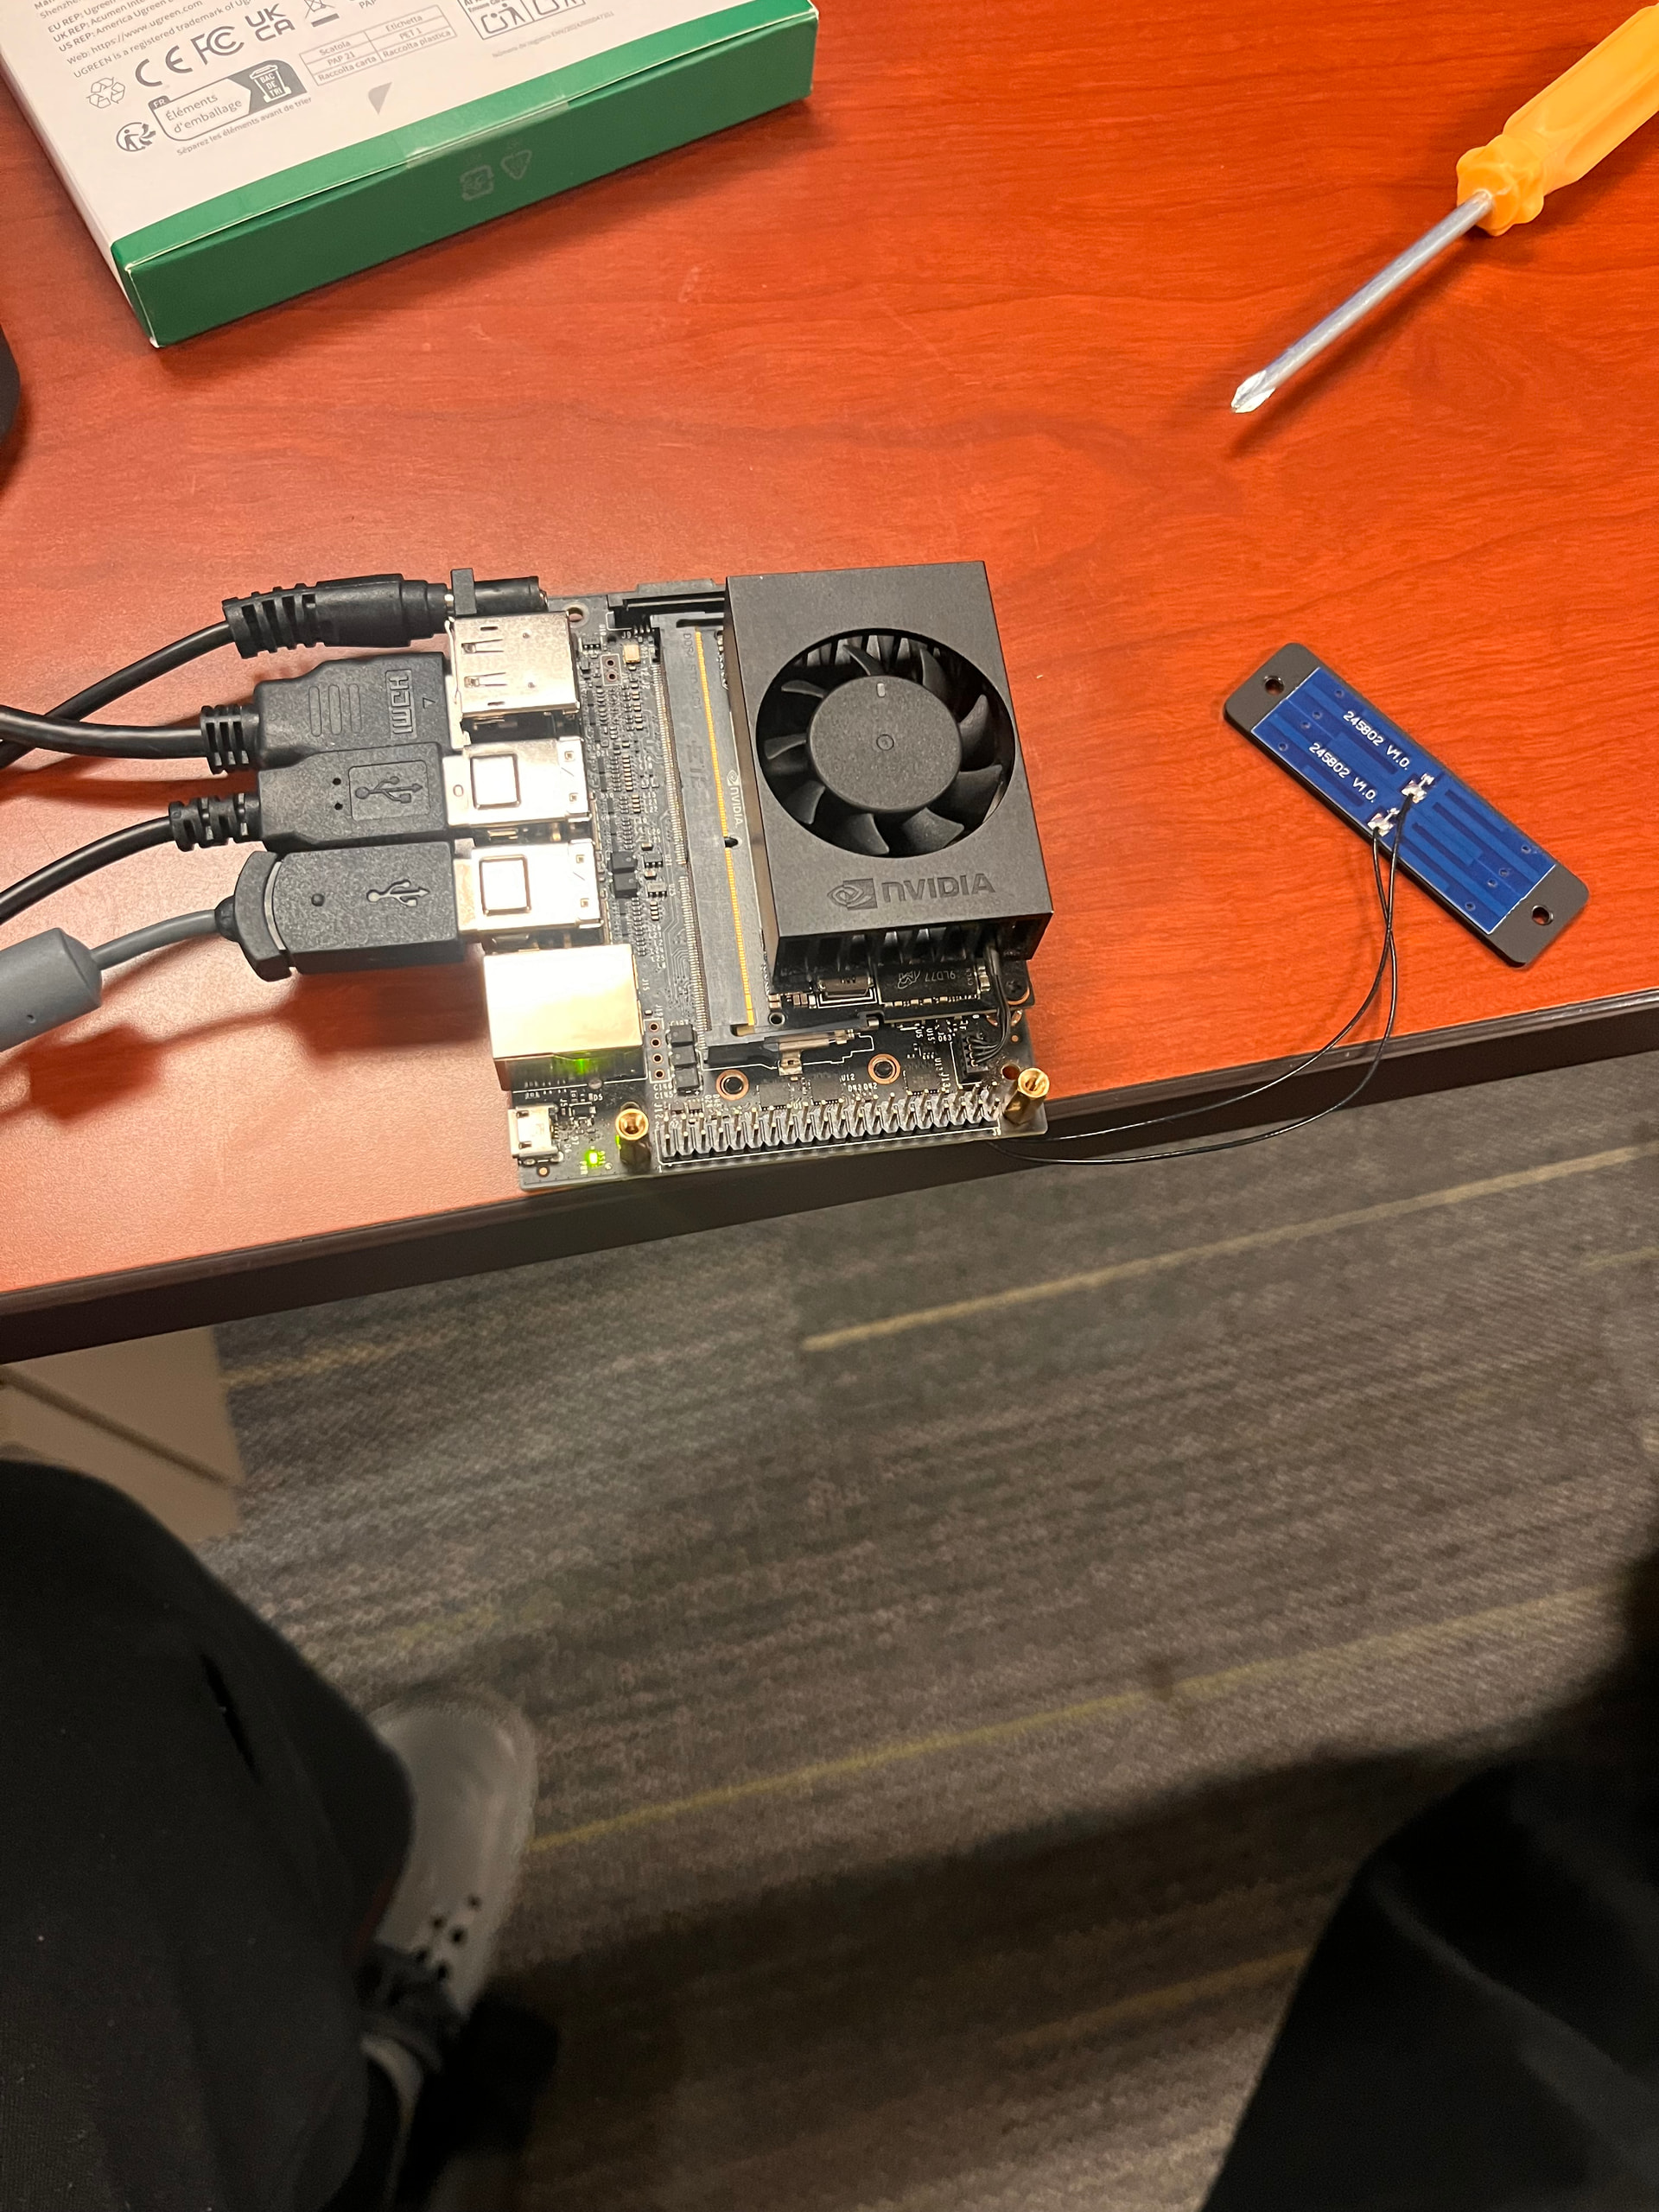
By SSD, we mean the NVMe solid-state drive installed on the back of the Jetson controller and secured with a small screw. If the device in your second photo is that module removed from the Jetson, then yes, that is the SSD.
For the ROSOrin Orin NX setup, write the Orin NX image to this NVMe SSD, not to a microSD card. The official procedure is to remove the SSD while power is off, connect it to the computer through an SSD enclosure, write the image to the SSD, ignore any Windows prompts to format partitions after writing, and then reinstall the SSD firmly.
If the first photo shows the card you originally flashed and it is a microSD card, please reflash the NVMe SSD instead. Keep the robot powered off and do not test it again until the correct 3-pin-to-DC power cable is installed as previously described.
If this reply was helpful, you can mark it as the solution using the button below.
No, you do not need to erase the microSD card. It is not used as the boot drive for the ROSOrin Orin NX setup, so you can leave it unchanged and reformat it later only if you want to reuse it.
Flash the correct Orin NX image to the new NVMe M.2 SSD. Writing the image will erase the SSD, so select the correct drive carefully. After flashing:
Ignore and cancel any Windows prompts asking you to format partitions.
Reinstall the NVMe SSD firmly while the robot is powered off.
Wait until the correct 3-pin-to-DC power cable is installed before powering on the robot again.
If this reply was helpful, you can mark it as the solution using the button below.
Yes. The Hiwonder file is the system image intended for this Jetson setup. However, the documented ROSOrin Orin NX procedure boots from the NVMe M.2 SSD, not from a microSD card. Therefore, testing with the image written to the microSD card will not boot the intended system; this does not mean the image is not an operating system image.
You do not need to erase the microSD card.
With the Jetson powered off, write the correct Orin NX image to the NVMe M.2 SSD. Select the SSD carefully because writing the image overwrites it.
Cancel any Windows prompts asking to format partitions after the image is written.
Reinstall and secure the SSD, then use the correct Orin NX power wiring and 3-pin-to-DC cable before powering the robot again.
The Orin NX startup instructions require the imaged SSD to be installed before power is applied. If it still does not start afterward, provide the exact image filename and clear photos of the installed SSD and power connections.
If this reply was helpful, you can mark it as the solution using the button below.
I am having an issue with my ROSOrin ROS2 robot where the robot powers on, but it does not produce the Hiwonder HW Wi-Fi network, and the remote control also does not connect.
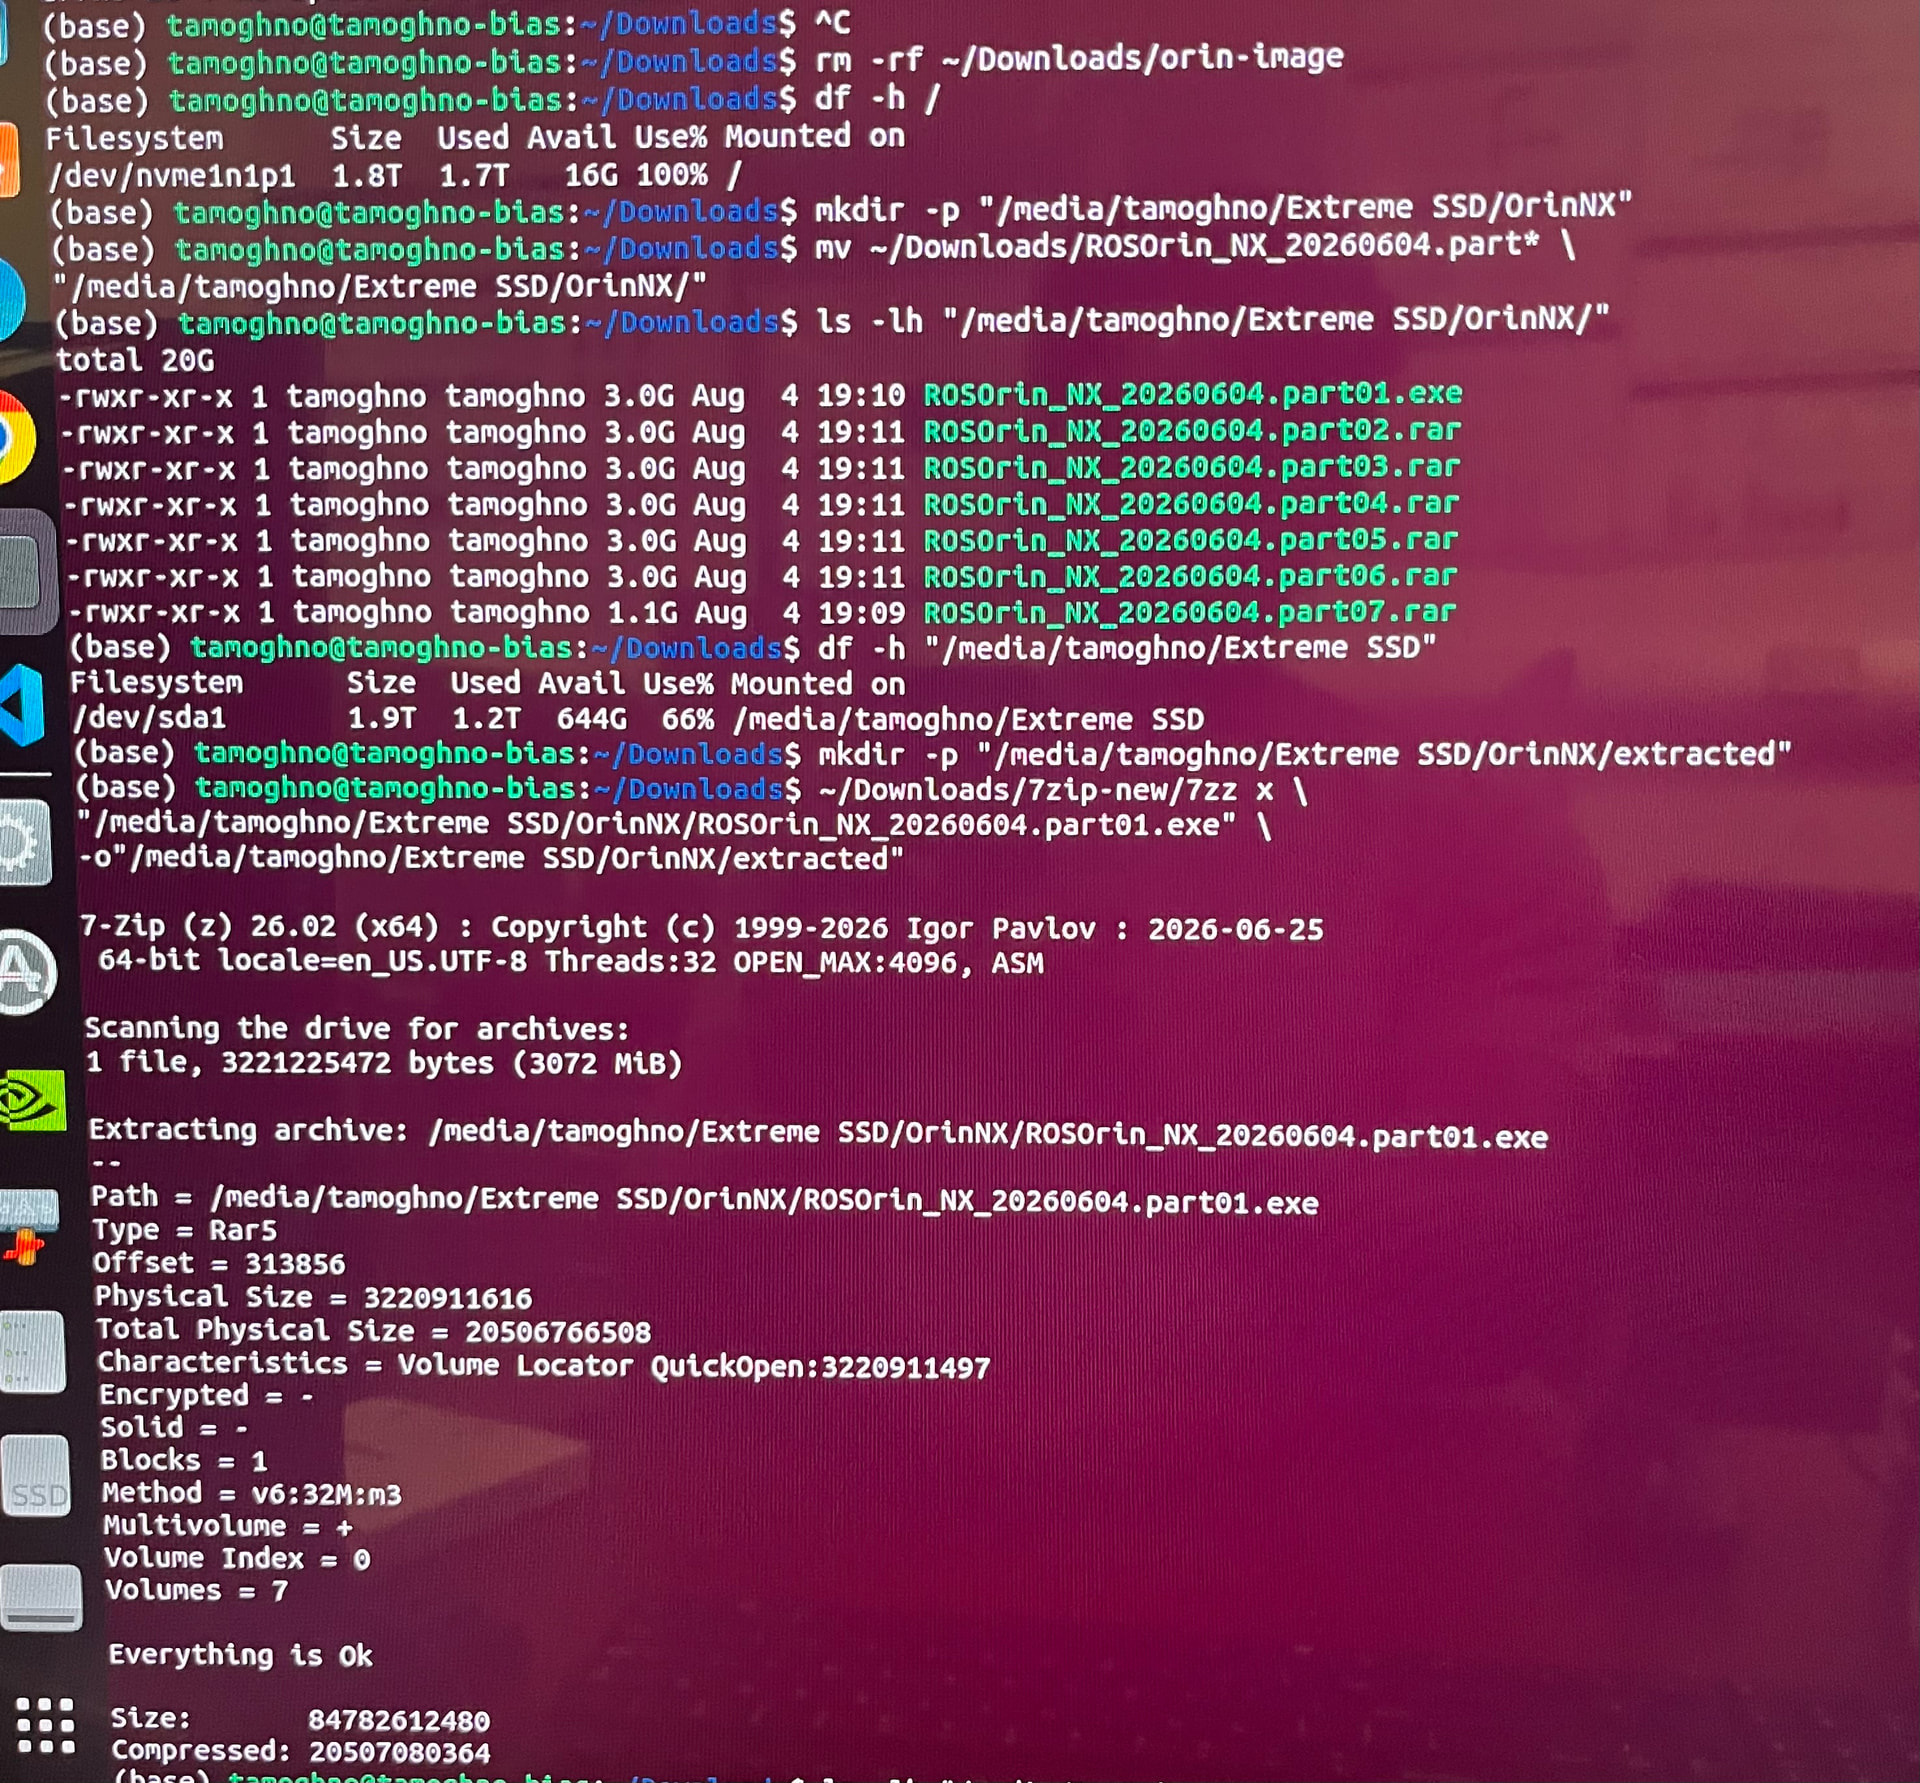
I recently reflashed the SSD because I suspected the operating system/image was corrupted. I combined all 7 parts of the image into a single approximately 84 GB image file and flashed it onto the SSD using Balena Etcher. Balena Etcher reported that the flashing process completed successfully.
However, after reinstalling the SSD in the robot, nothing changed. The robot has been powered on for more than 10 minutes, but:
The HW Wi-Fi network does not appear.
There is no startup beep.
The blue LED does not behave as expected during startup.
I held both KEY1 buttons for approximately 10–15 seconds, but nothing happened.
The battery voltage is above 10 V, so I do not believe the battery is the issue.
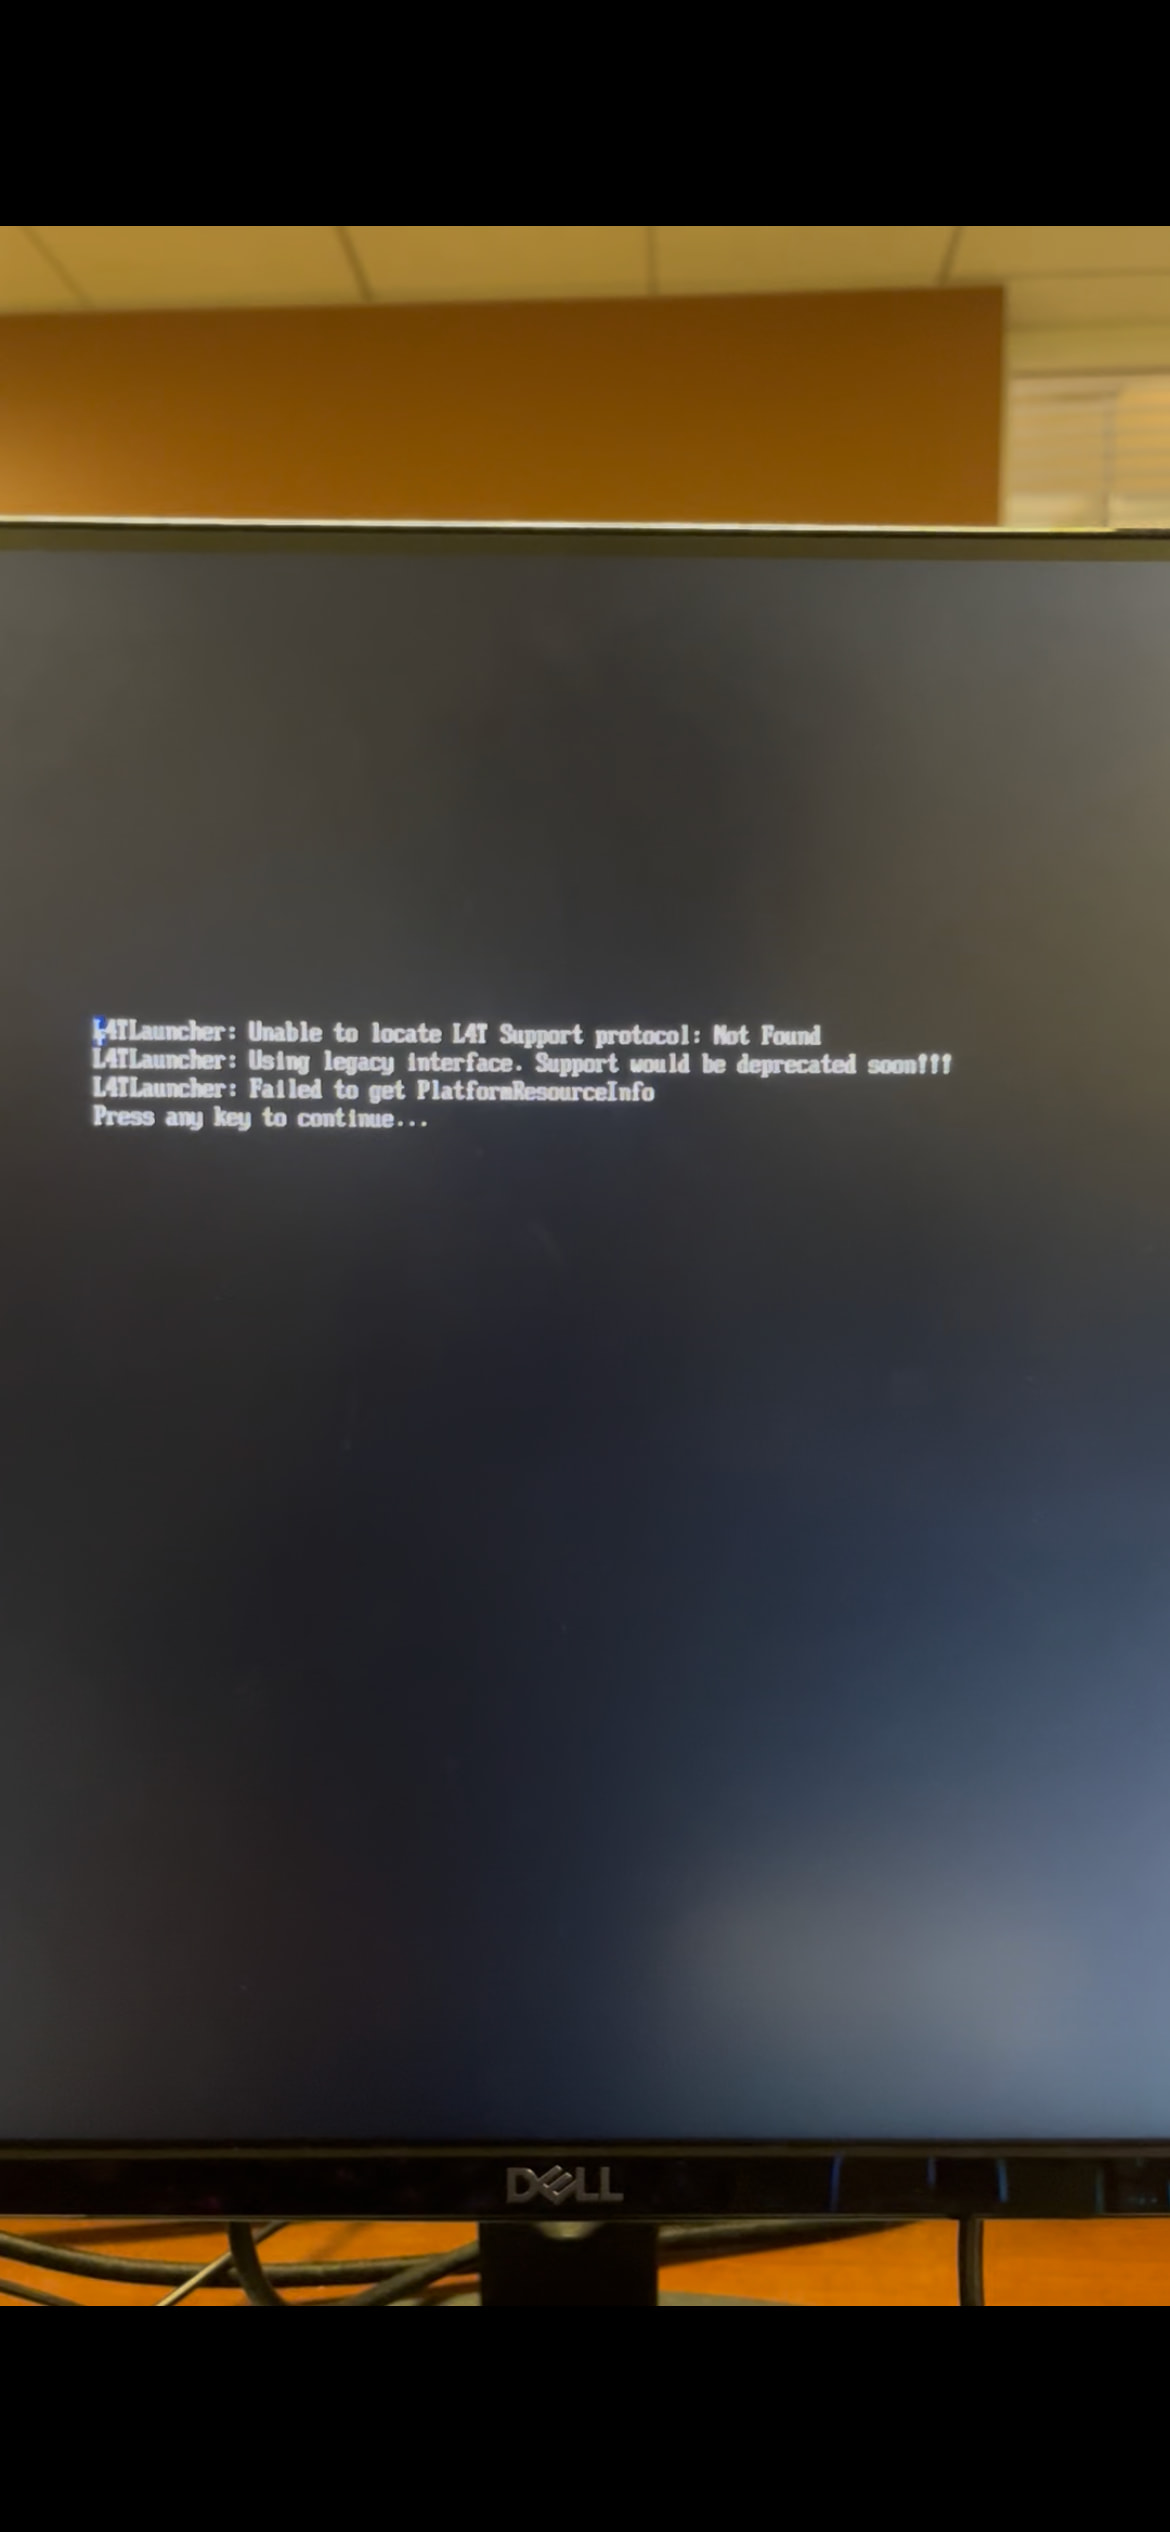
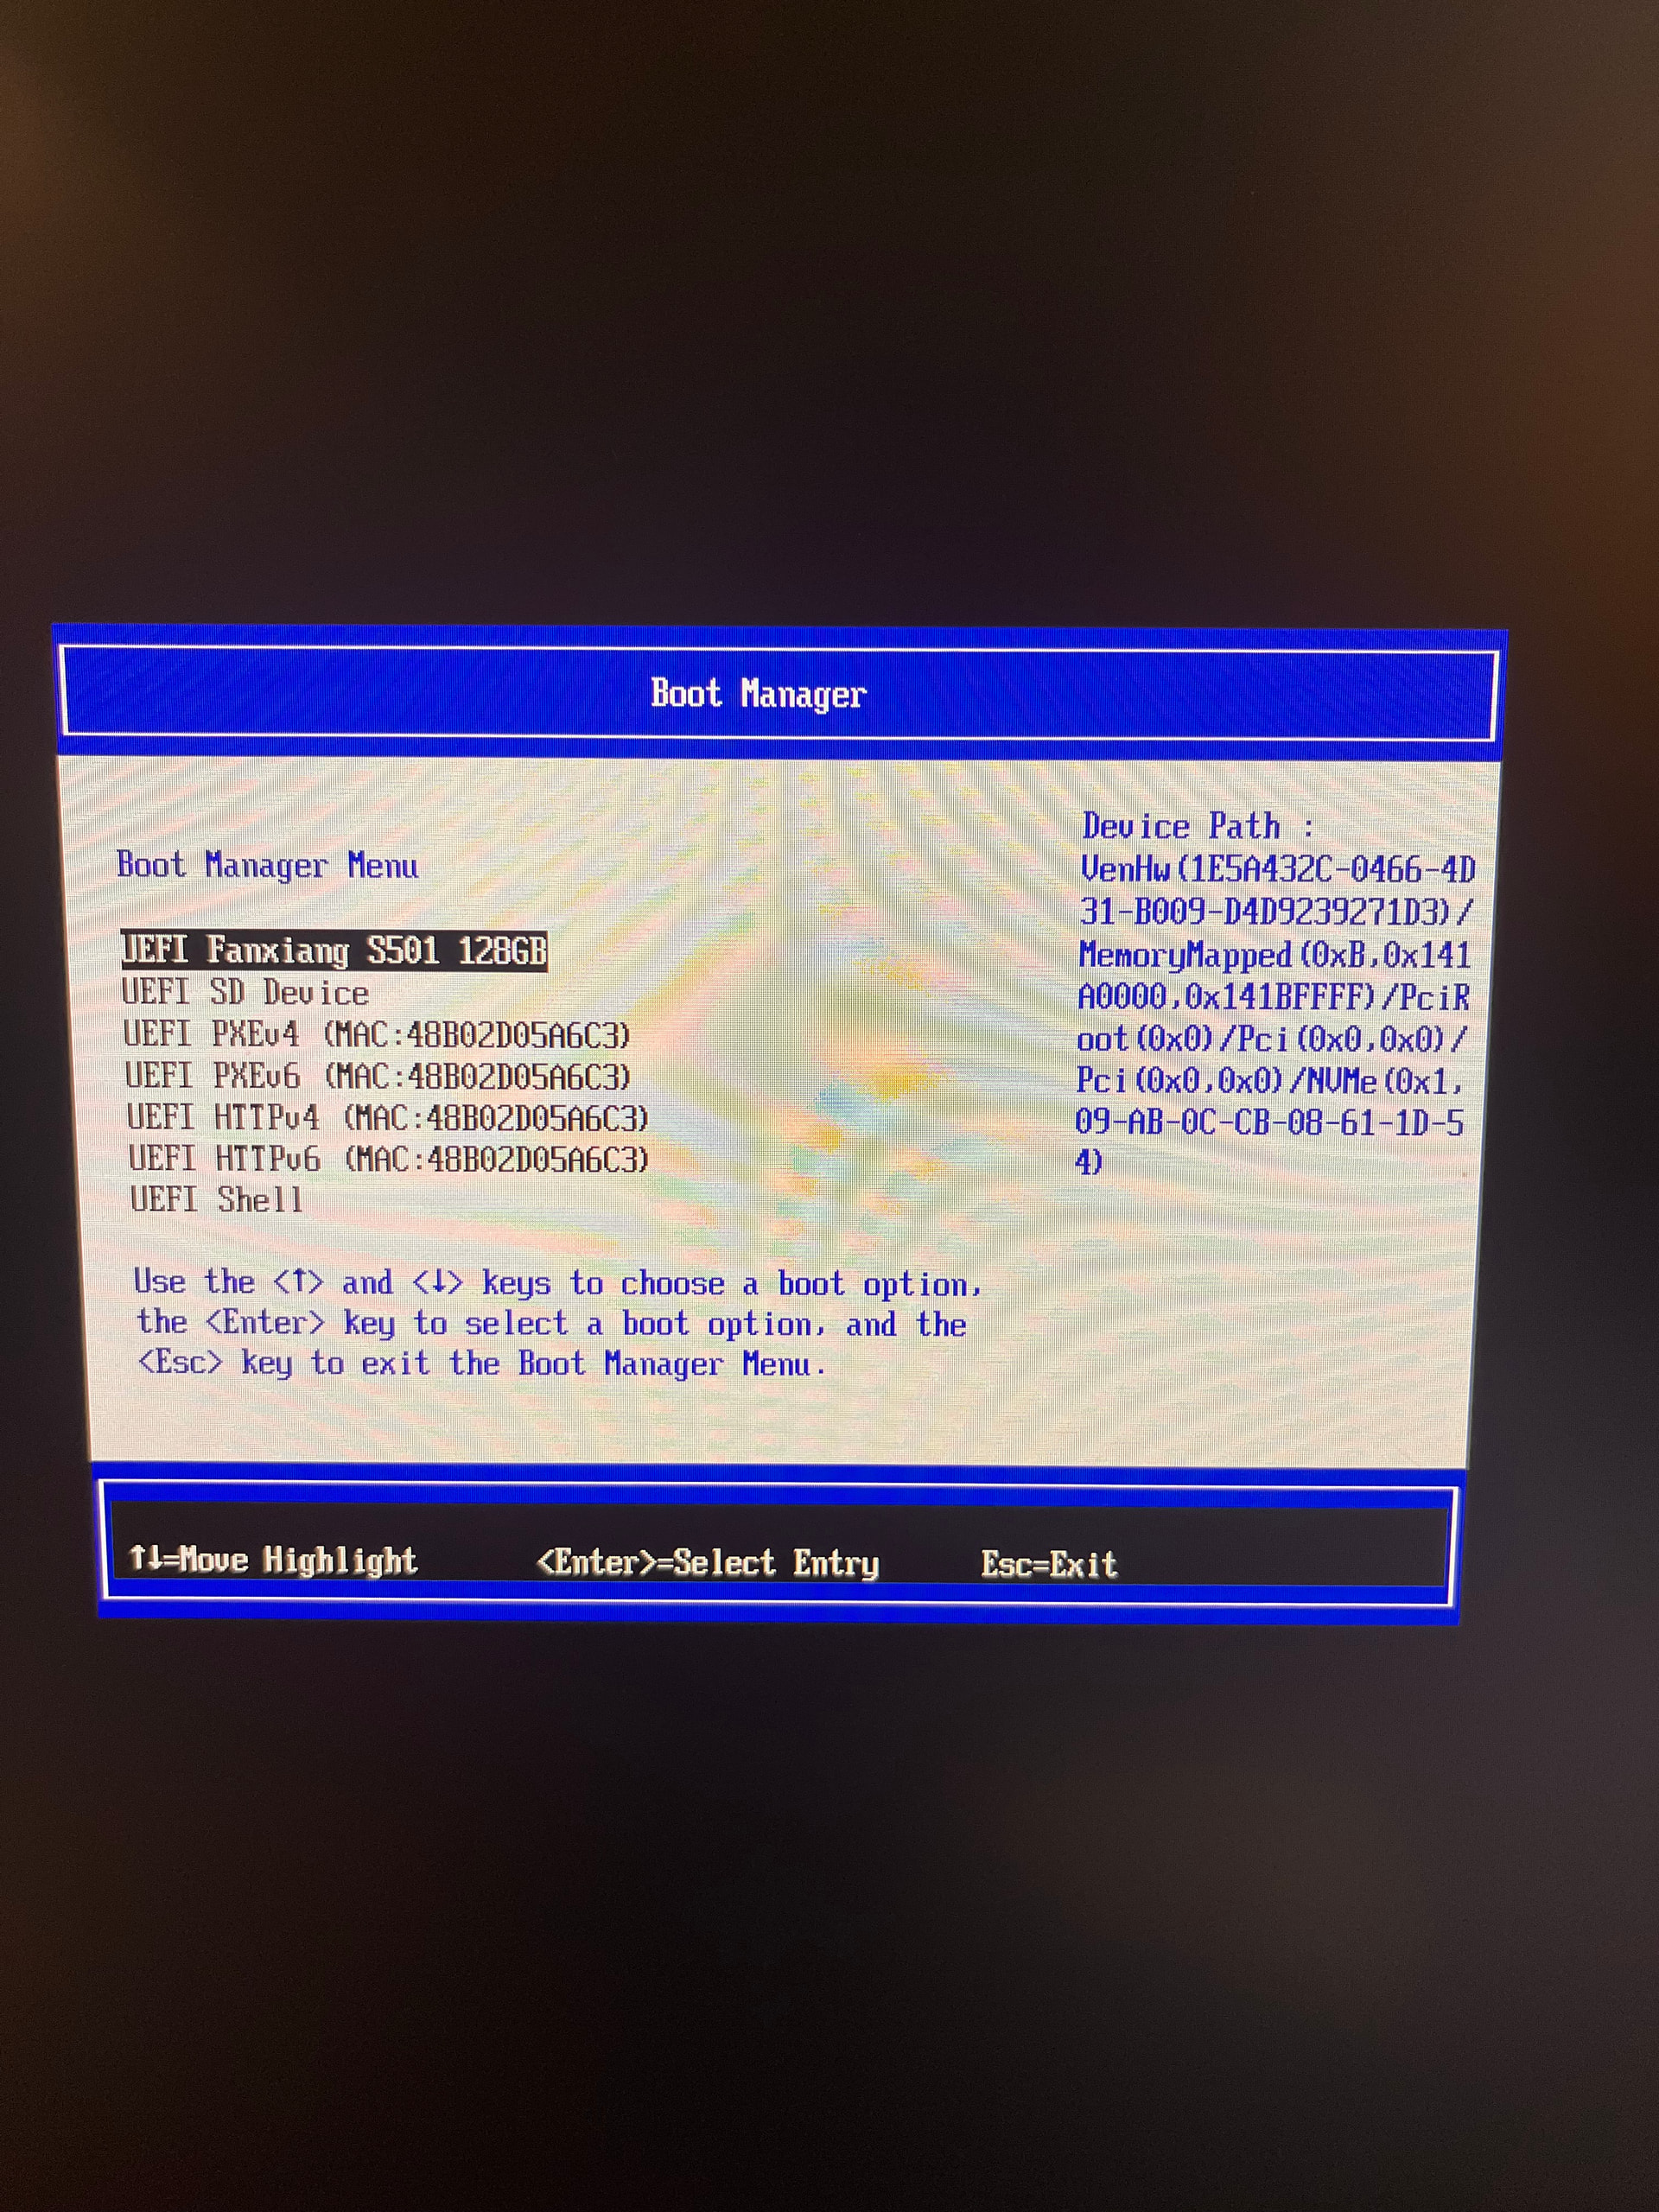
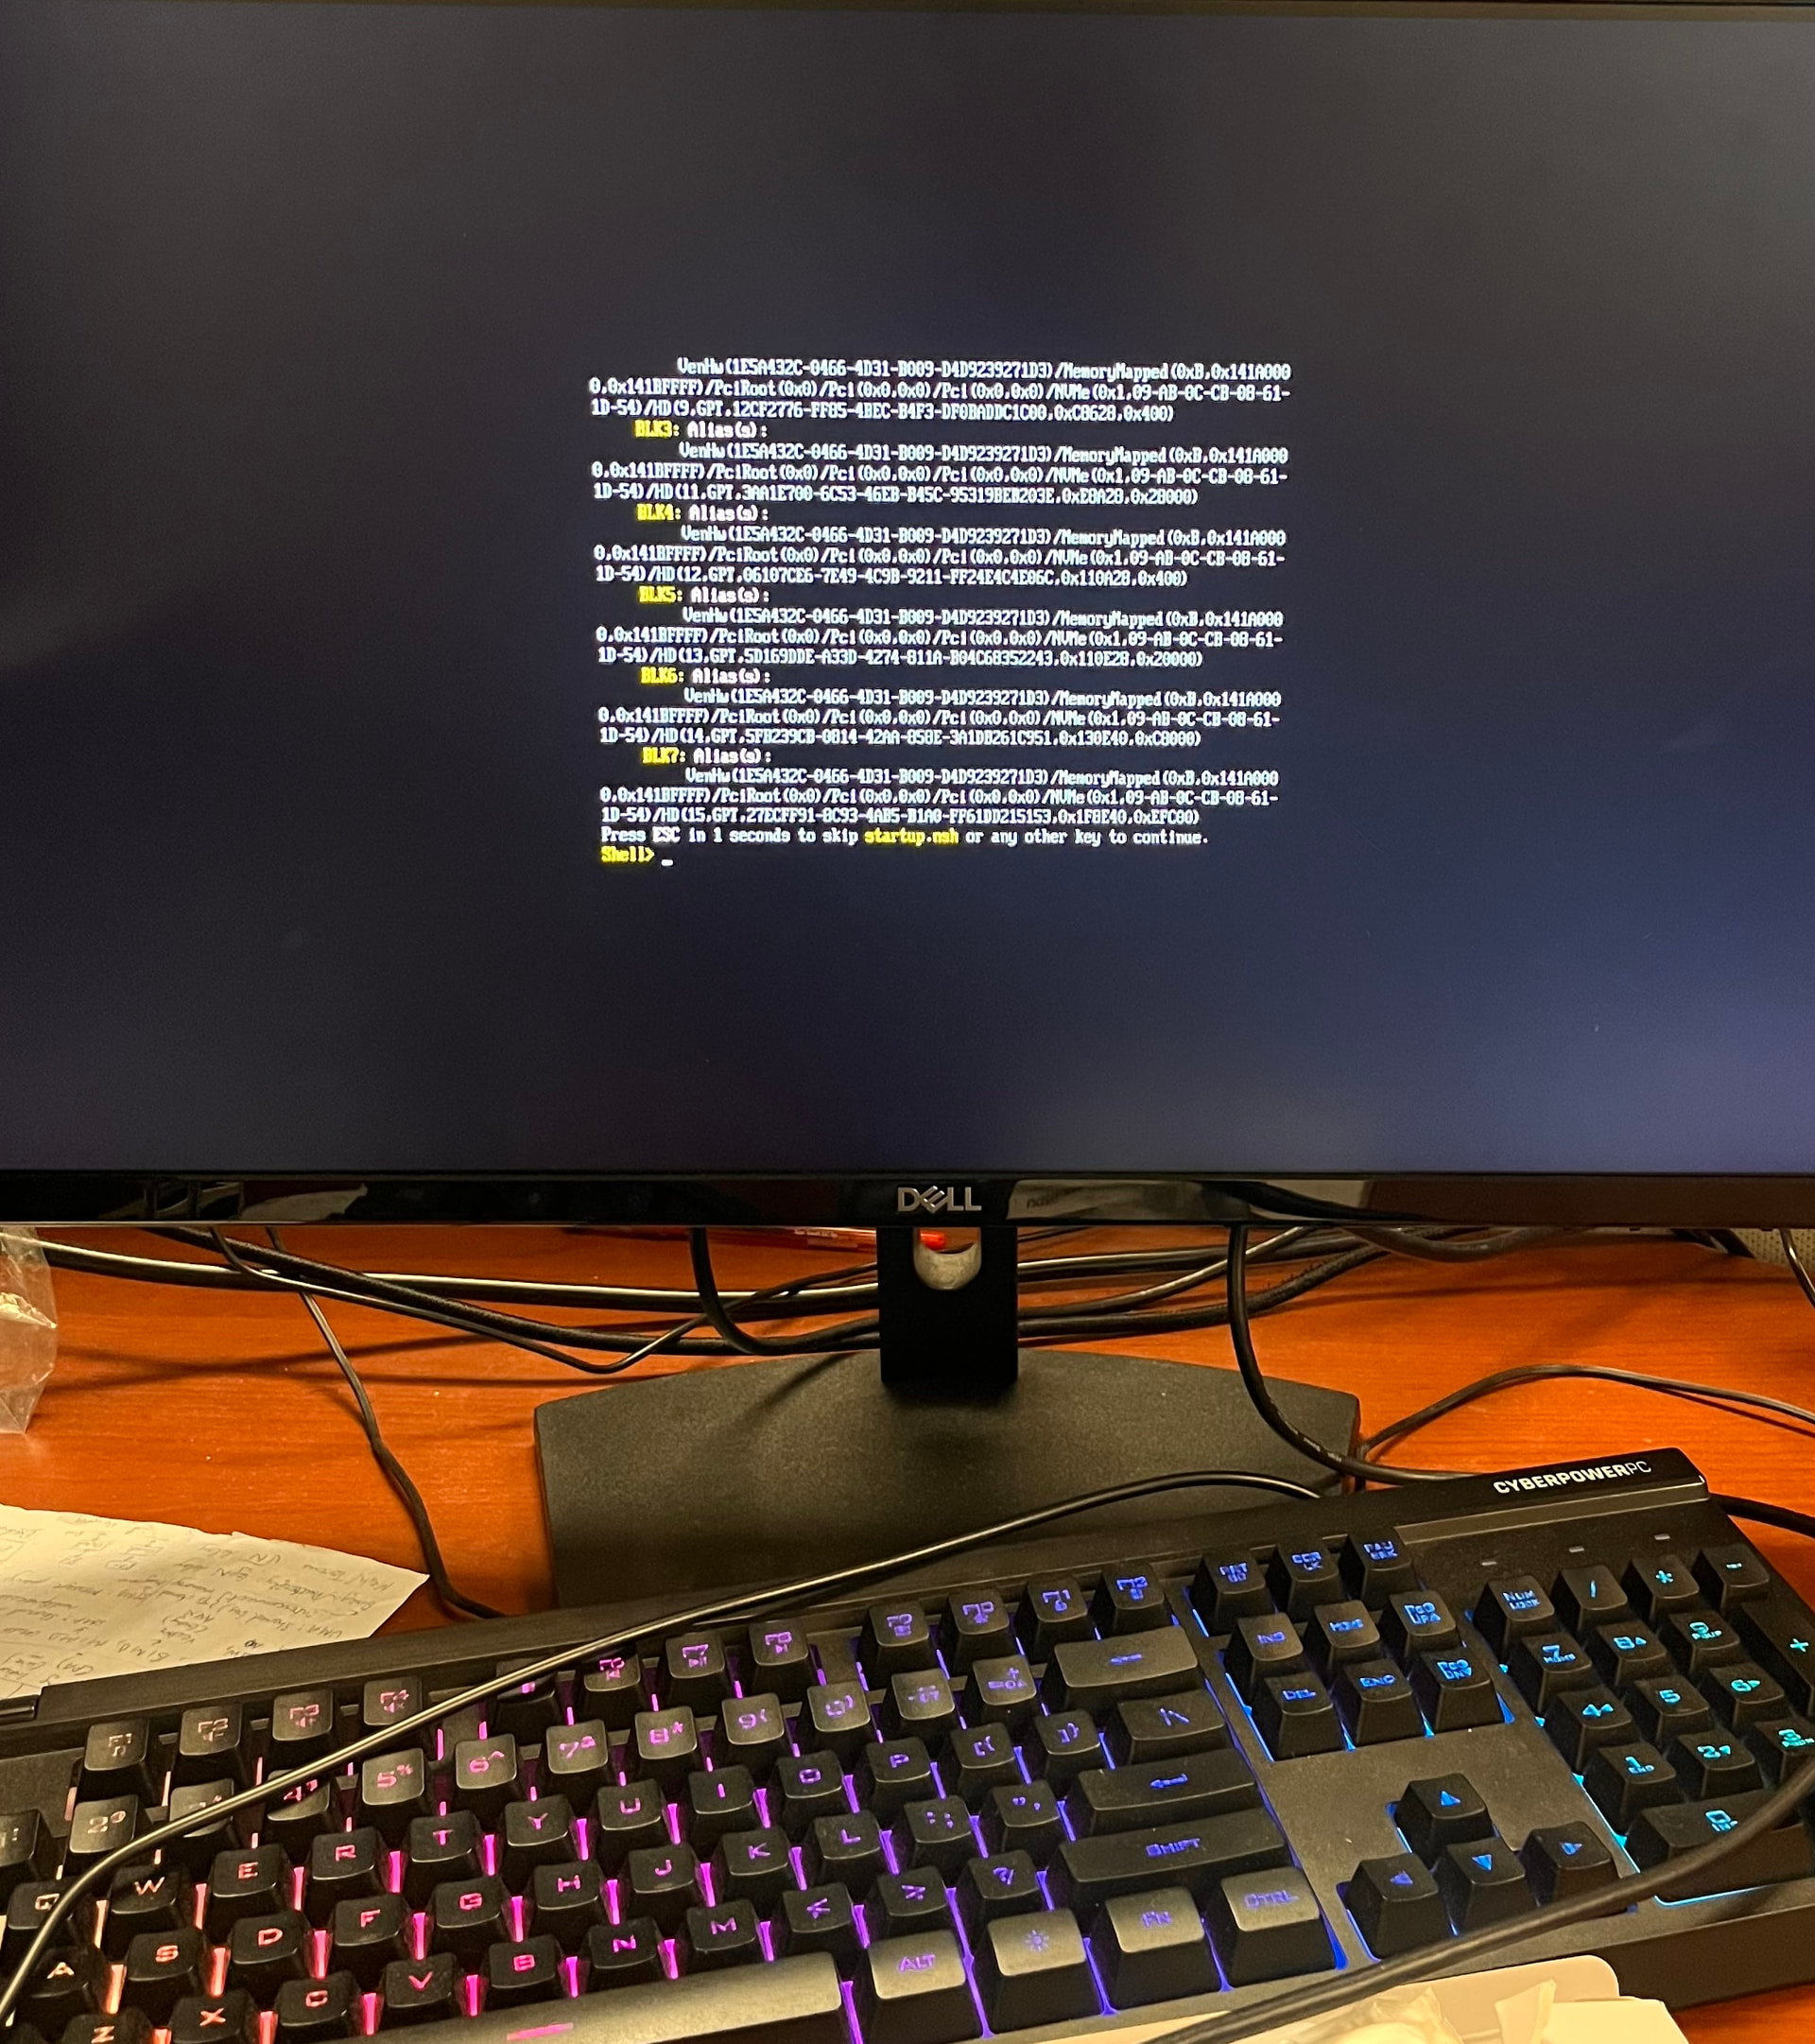
I also tried booting the Jetson separately with the SSD connected. However, the Jetson is unable to boot the operating system from the SSD and briefly displays an error related to L4T (Linux for Tegra).
I have attached pictures showing the entire process, including:
Combining the 7 image parts into the final image.
Flashing the image to the SSD using Balena Etcher.
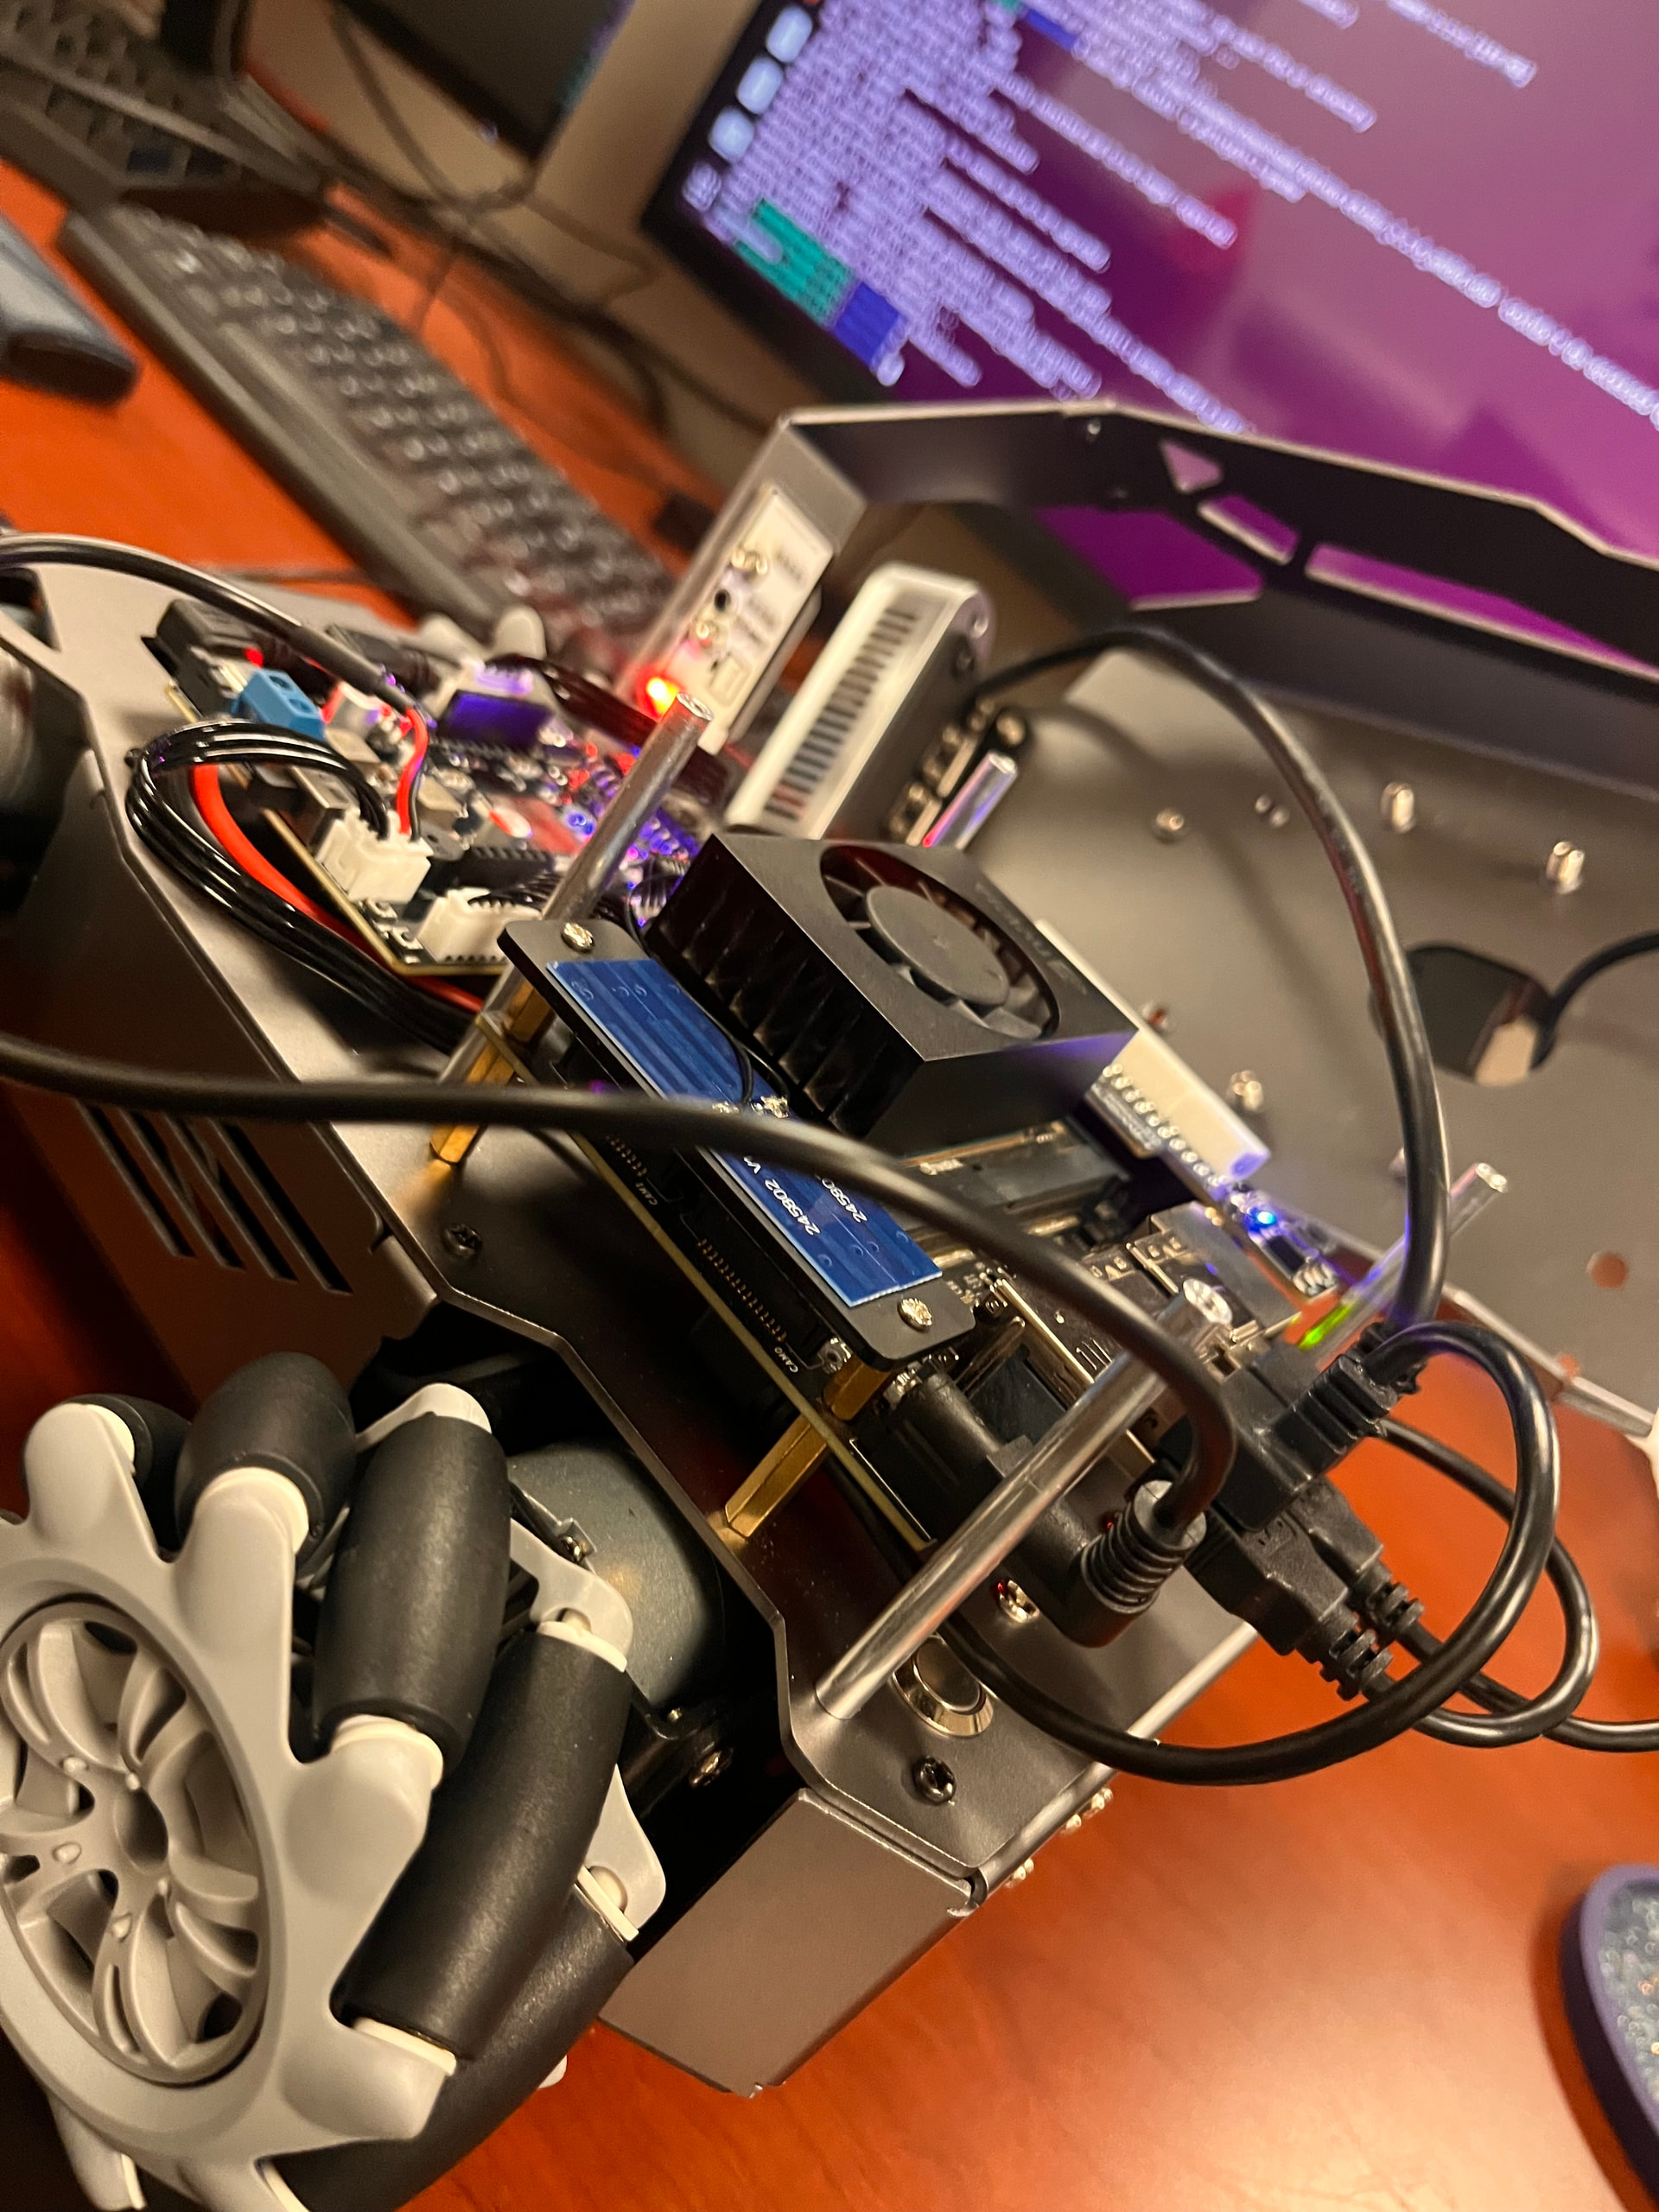
The SSD installed in the robot.
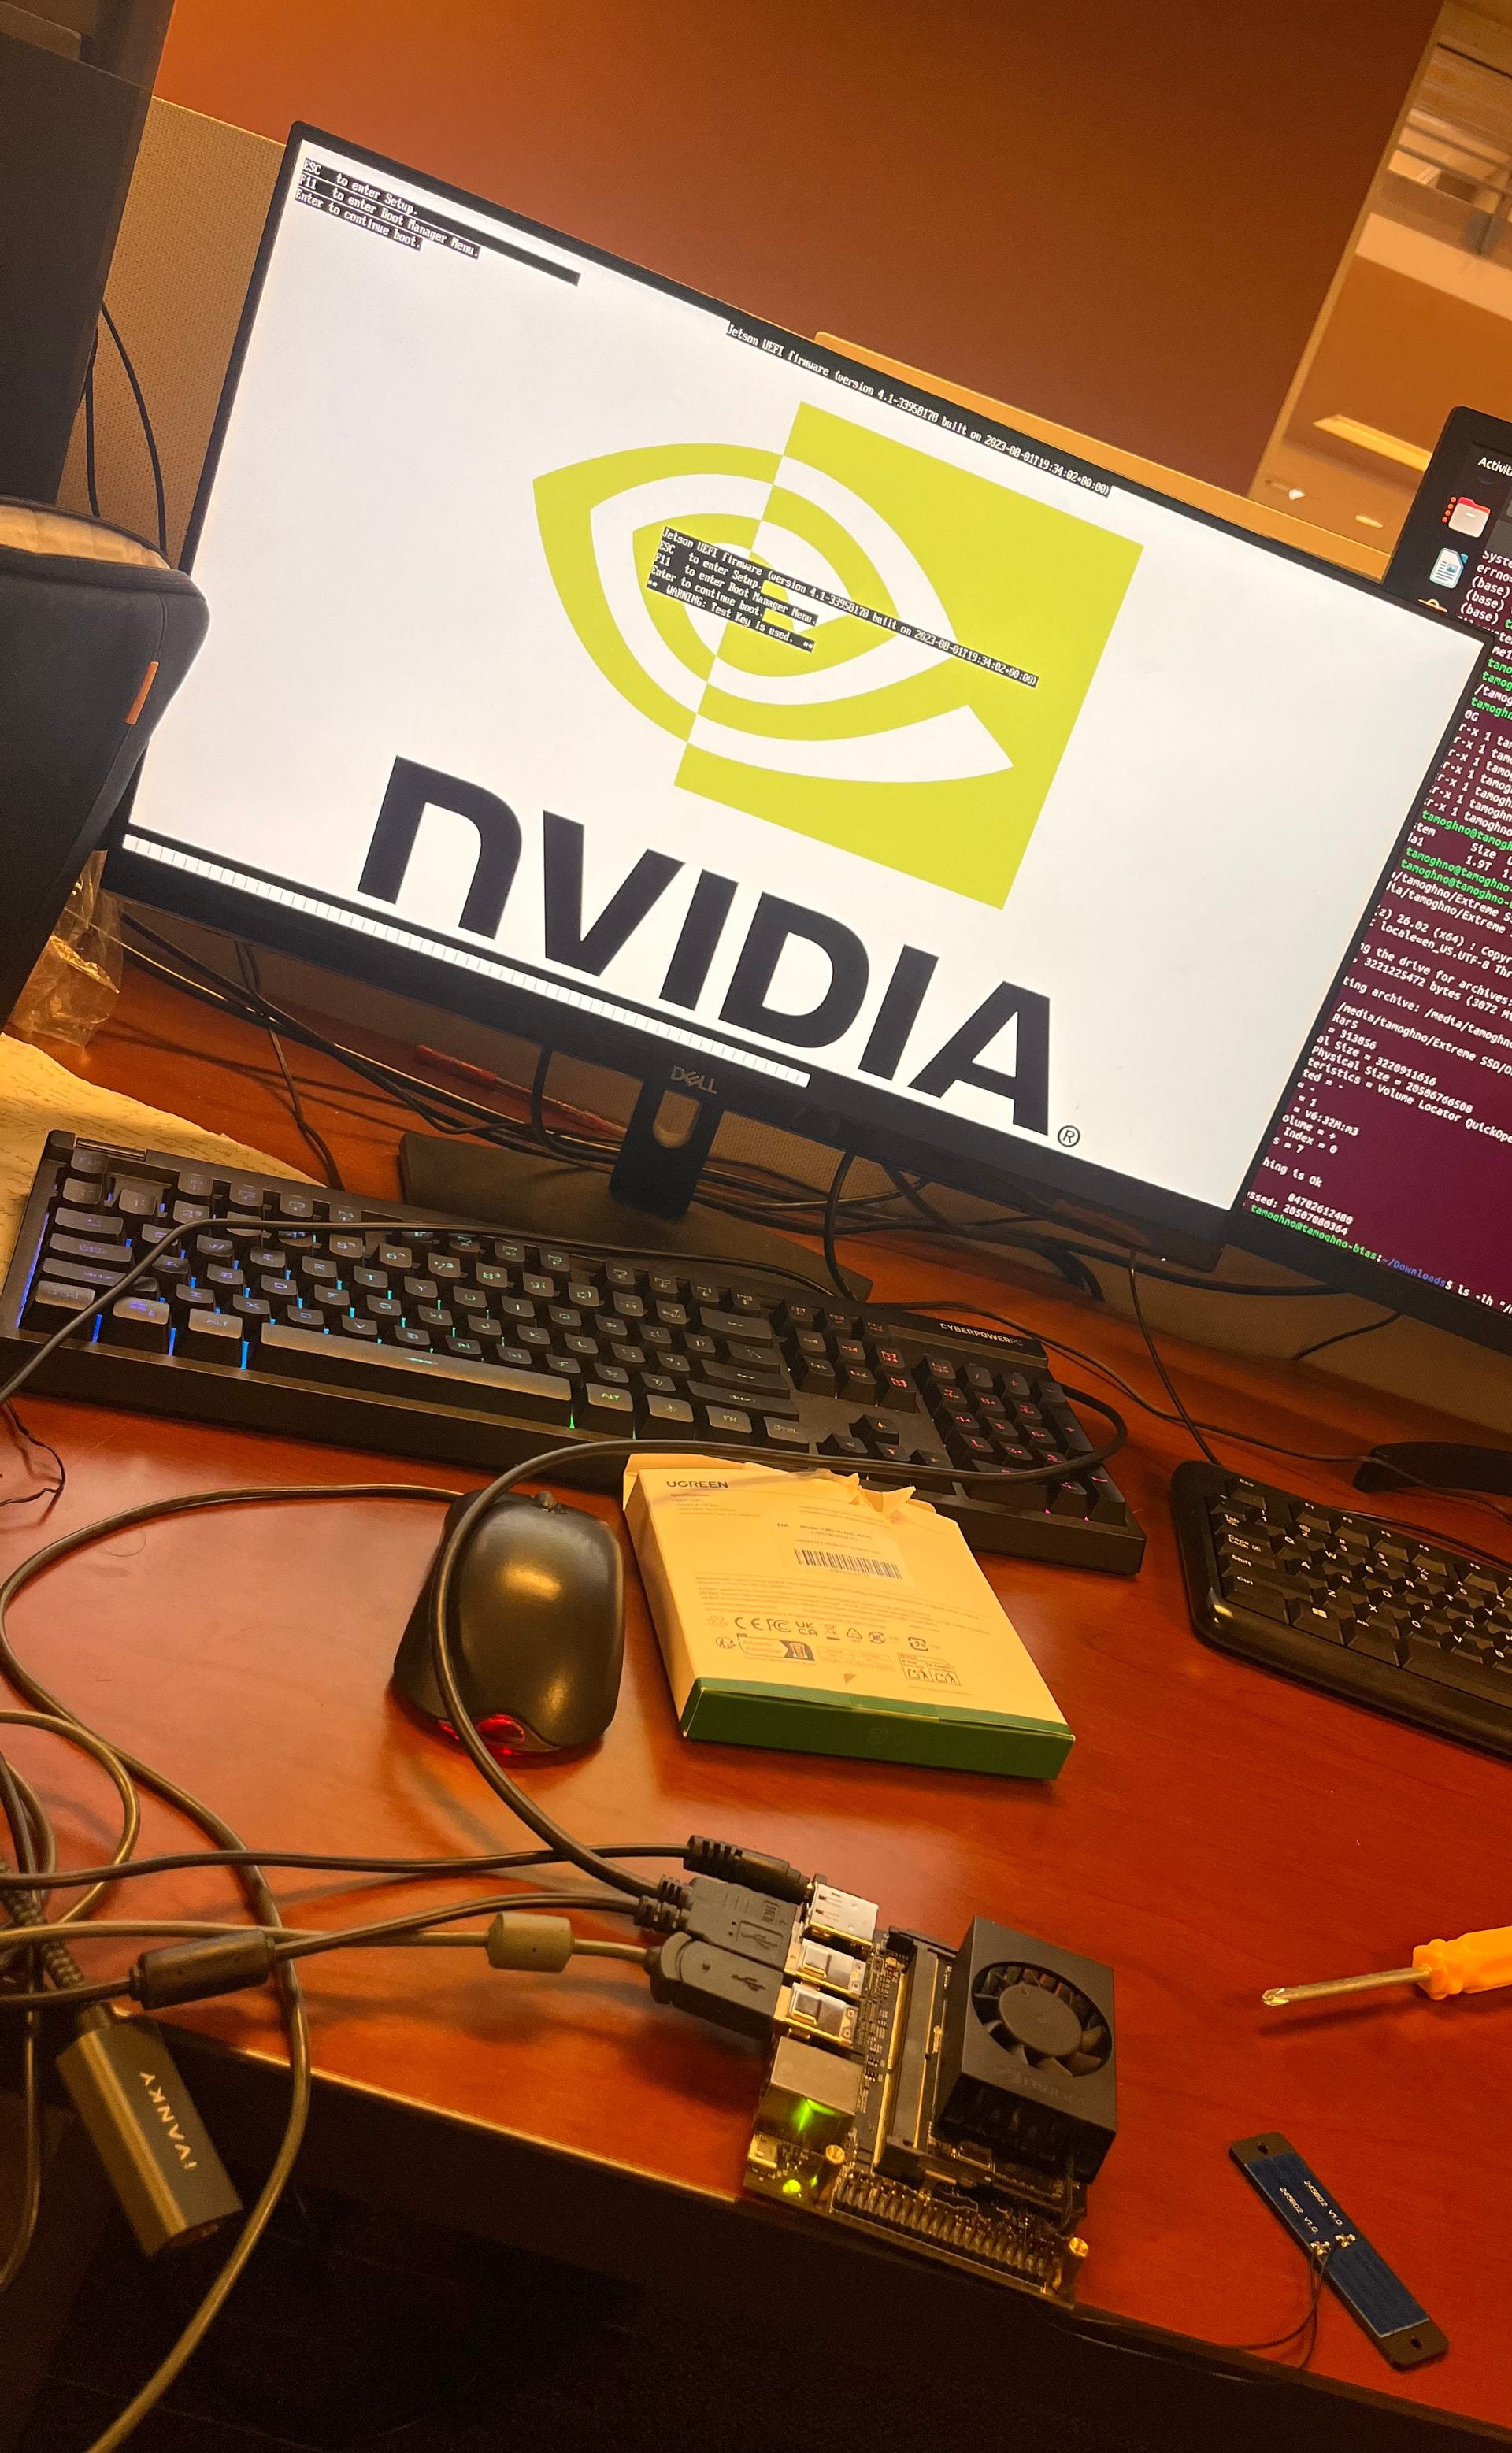
The robot powered on with no Wi-Fi.
The L4T error when attempting to boot the Jetson directly.
Could you please help me determine what is preventing the Jetson/SSD from booting and why the Hiwonder Wi-Fi is not being created? I would also appreciate guidance on whether I reconstructed the image correctly or if I need to use a different image/flash procedure for this ROSOrin version.
@Hiwonder_Scarlett Yes I am also not able to connect with the remote control, when i turn the controller on i see flashing green and red lights and when the robot turns on it stops flashing and i only see a bright red light, so the controller is responding but there is no movement.
That light pattern does not indicate a successful controller connection. On ROSOrin, after the robot has fully completed startup, switching the controller ON should make the red and green LEDs flash together. When pairing succeeds, the green LED remains on and the red LED turns off. A bright red LED alone is not the documented paired state, so no movement is expected.
Because the robot still has no startup beep or HW hotspot and the Jetson shows an L4T boot error, the Orin NX/SSD boot issue must be resolved first. The controller service is included in the robot’s startup service.
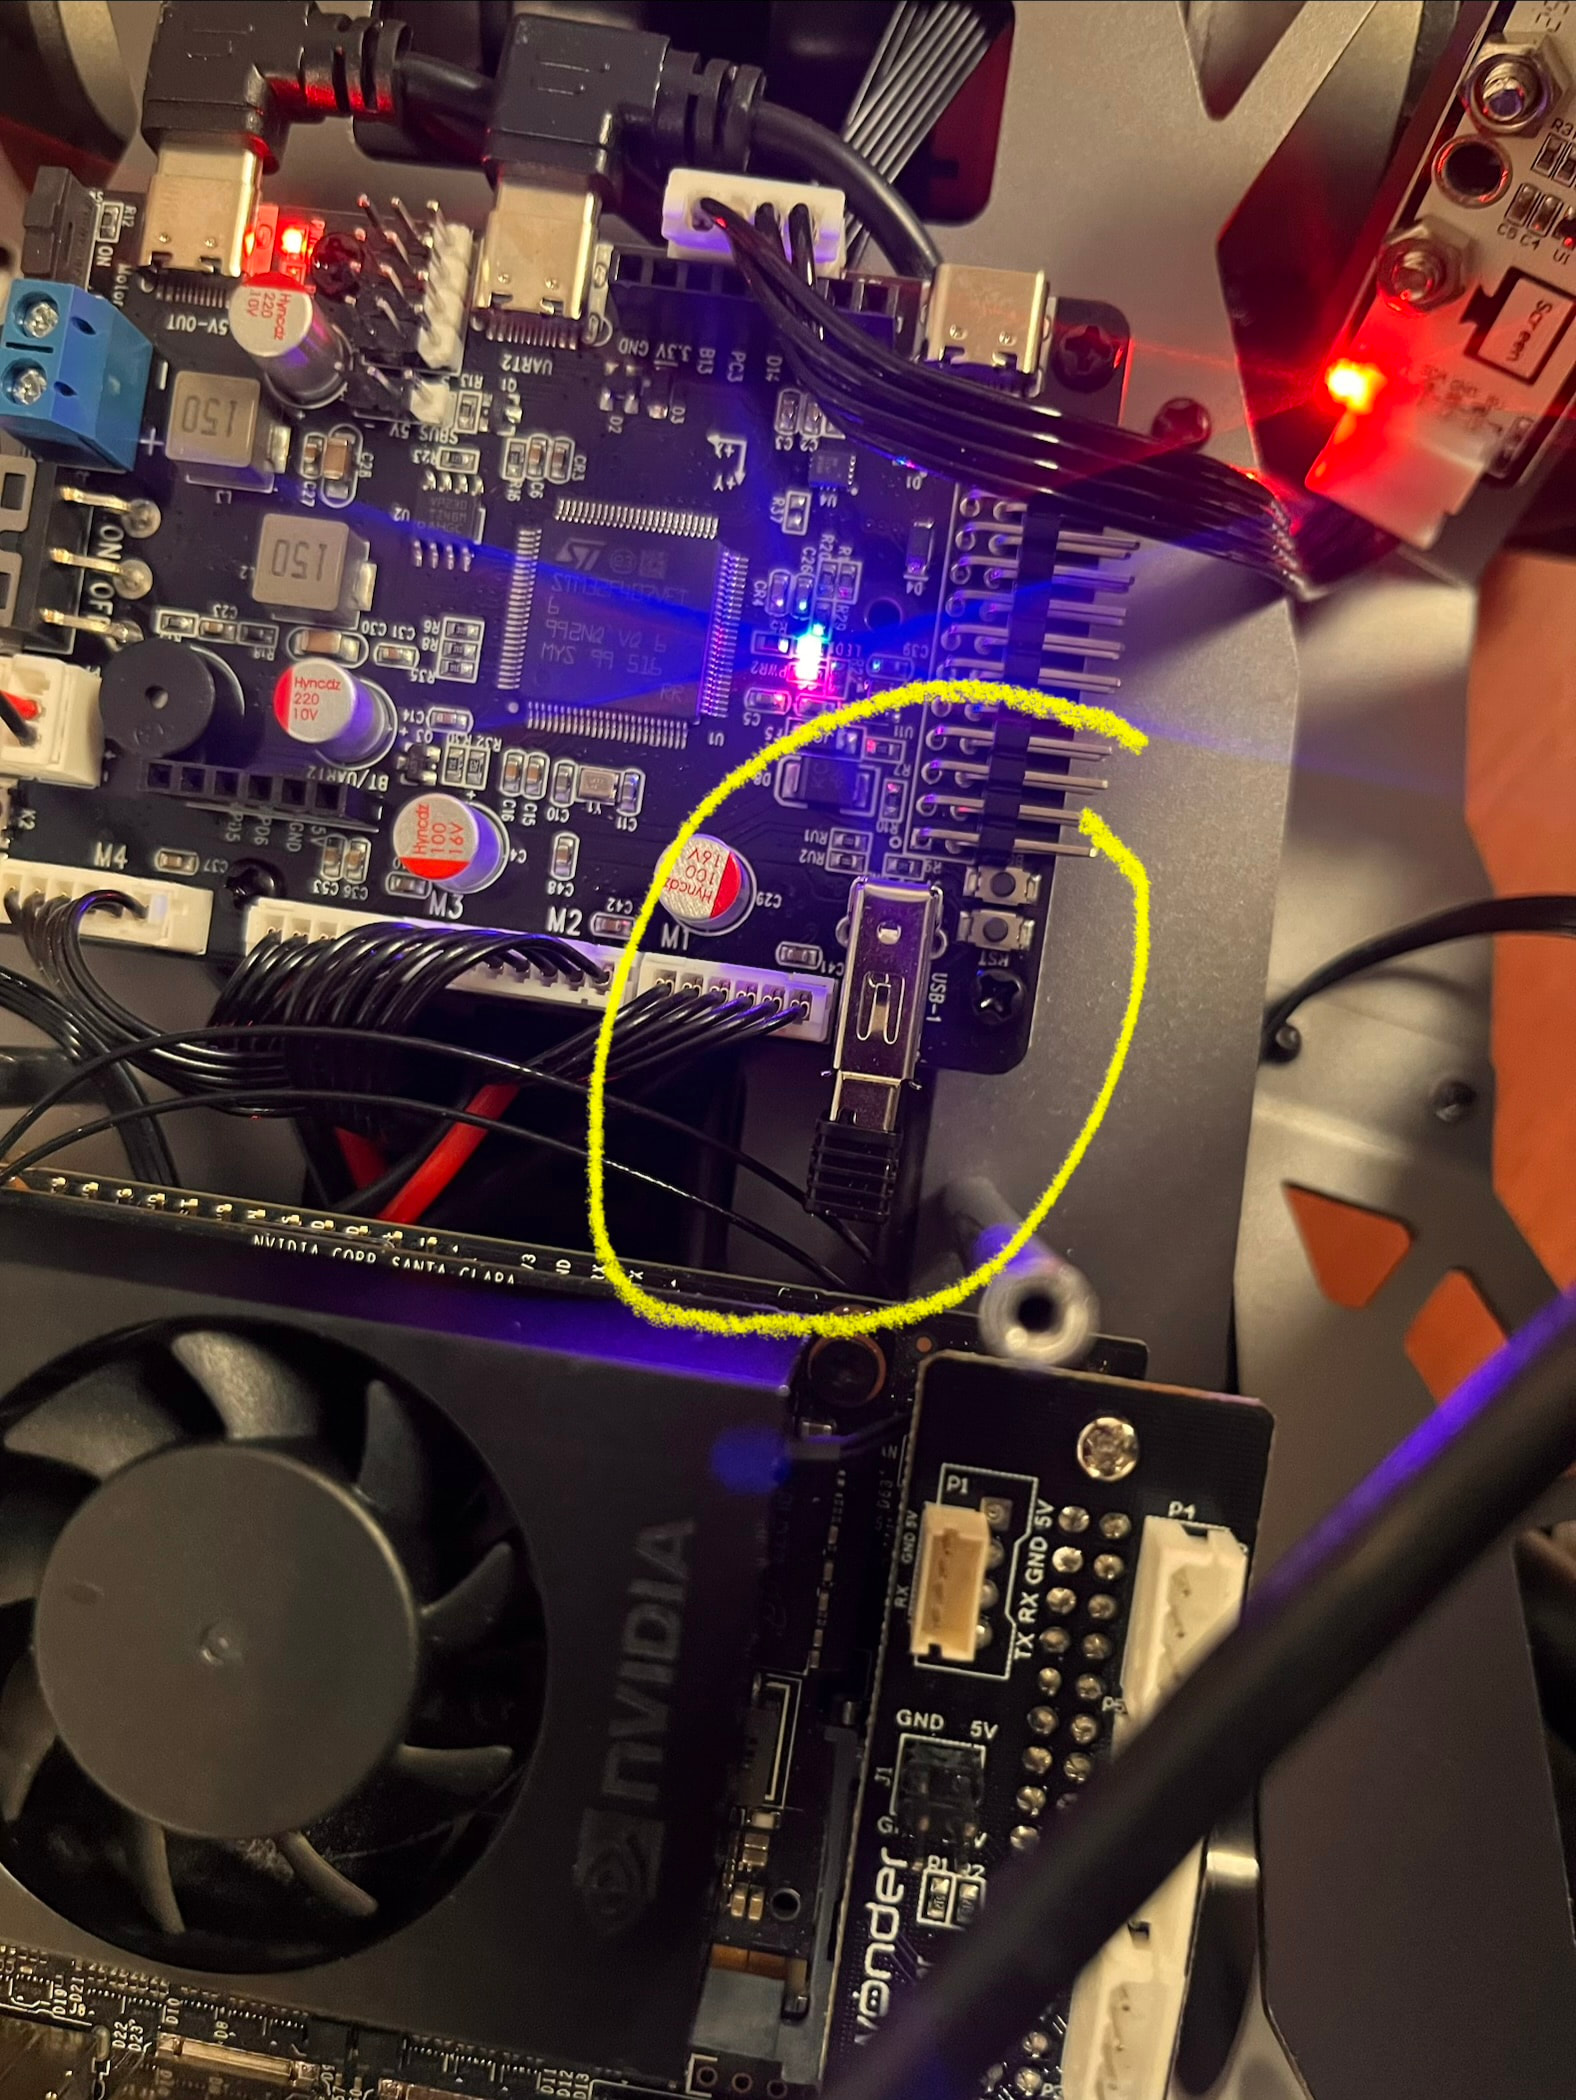
Power everything off and verify that the USB controller receiver is firmly inserted into the motion controller’s USB port.
Start the robot and wait for the startup beep before switching the controller on.
Switch the controller ON and wait for a steady green LED with the red LED off. If the controller has entered sleep mode, press START to wake it.
If it remains red after the robot boots normally, please provide a clear photo of the USB receiver and its connection, plus a short video showing the controller LEDs from power-on through the pairing attempt.
For now, the controller behavior should be treated as another consequence of the incomplete system startup, not as confirmation that the controller is connected.
If this reply was helpful, you can mark it as the solution using the button below.
That is okay; please upload clear photos of the USB receiver and its connection instead, and describe the controller LED sequence from power-on through the pairing attempt. Also confirm whether the robot produces the startup beep before you turn on the controller.
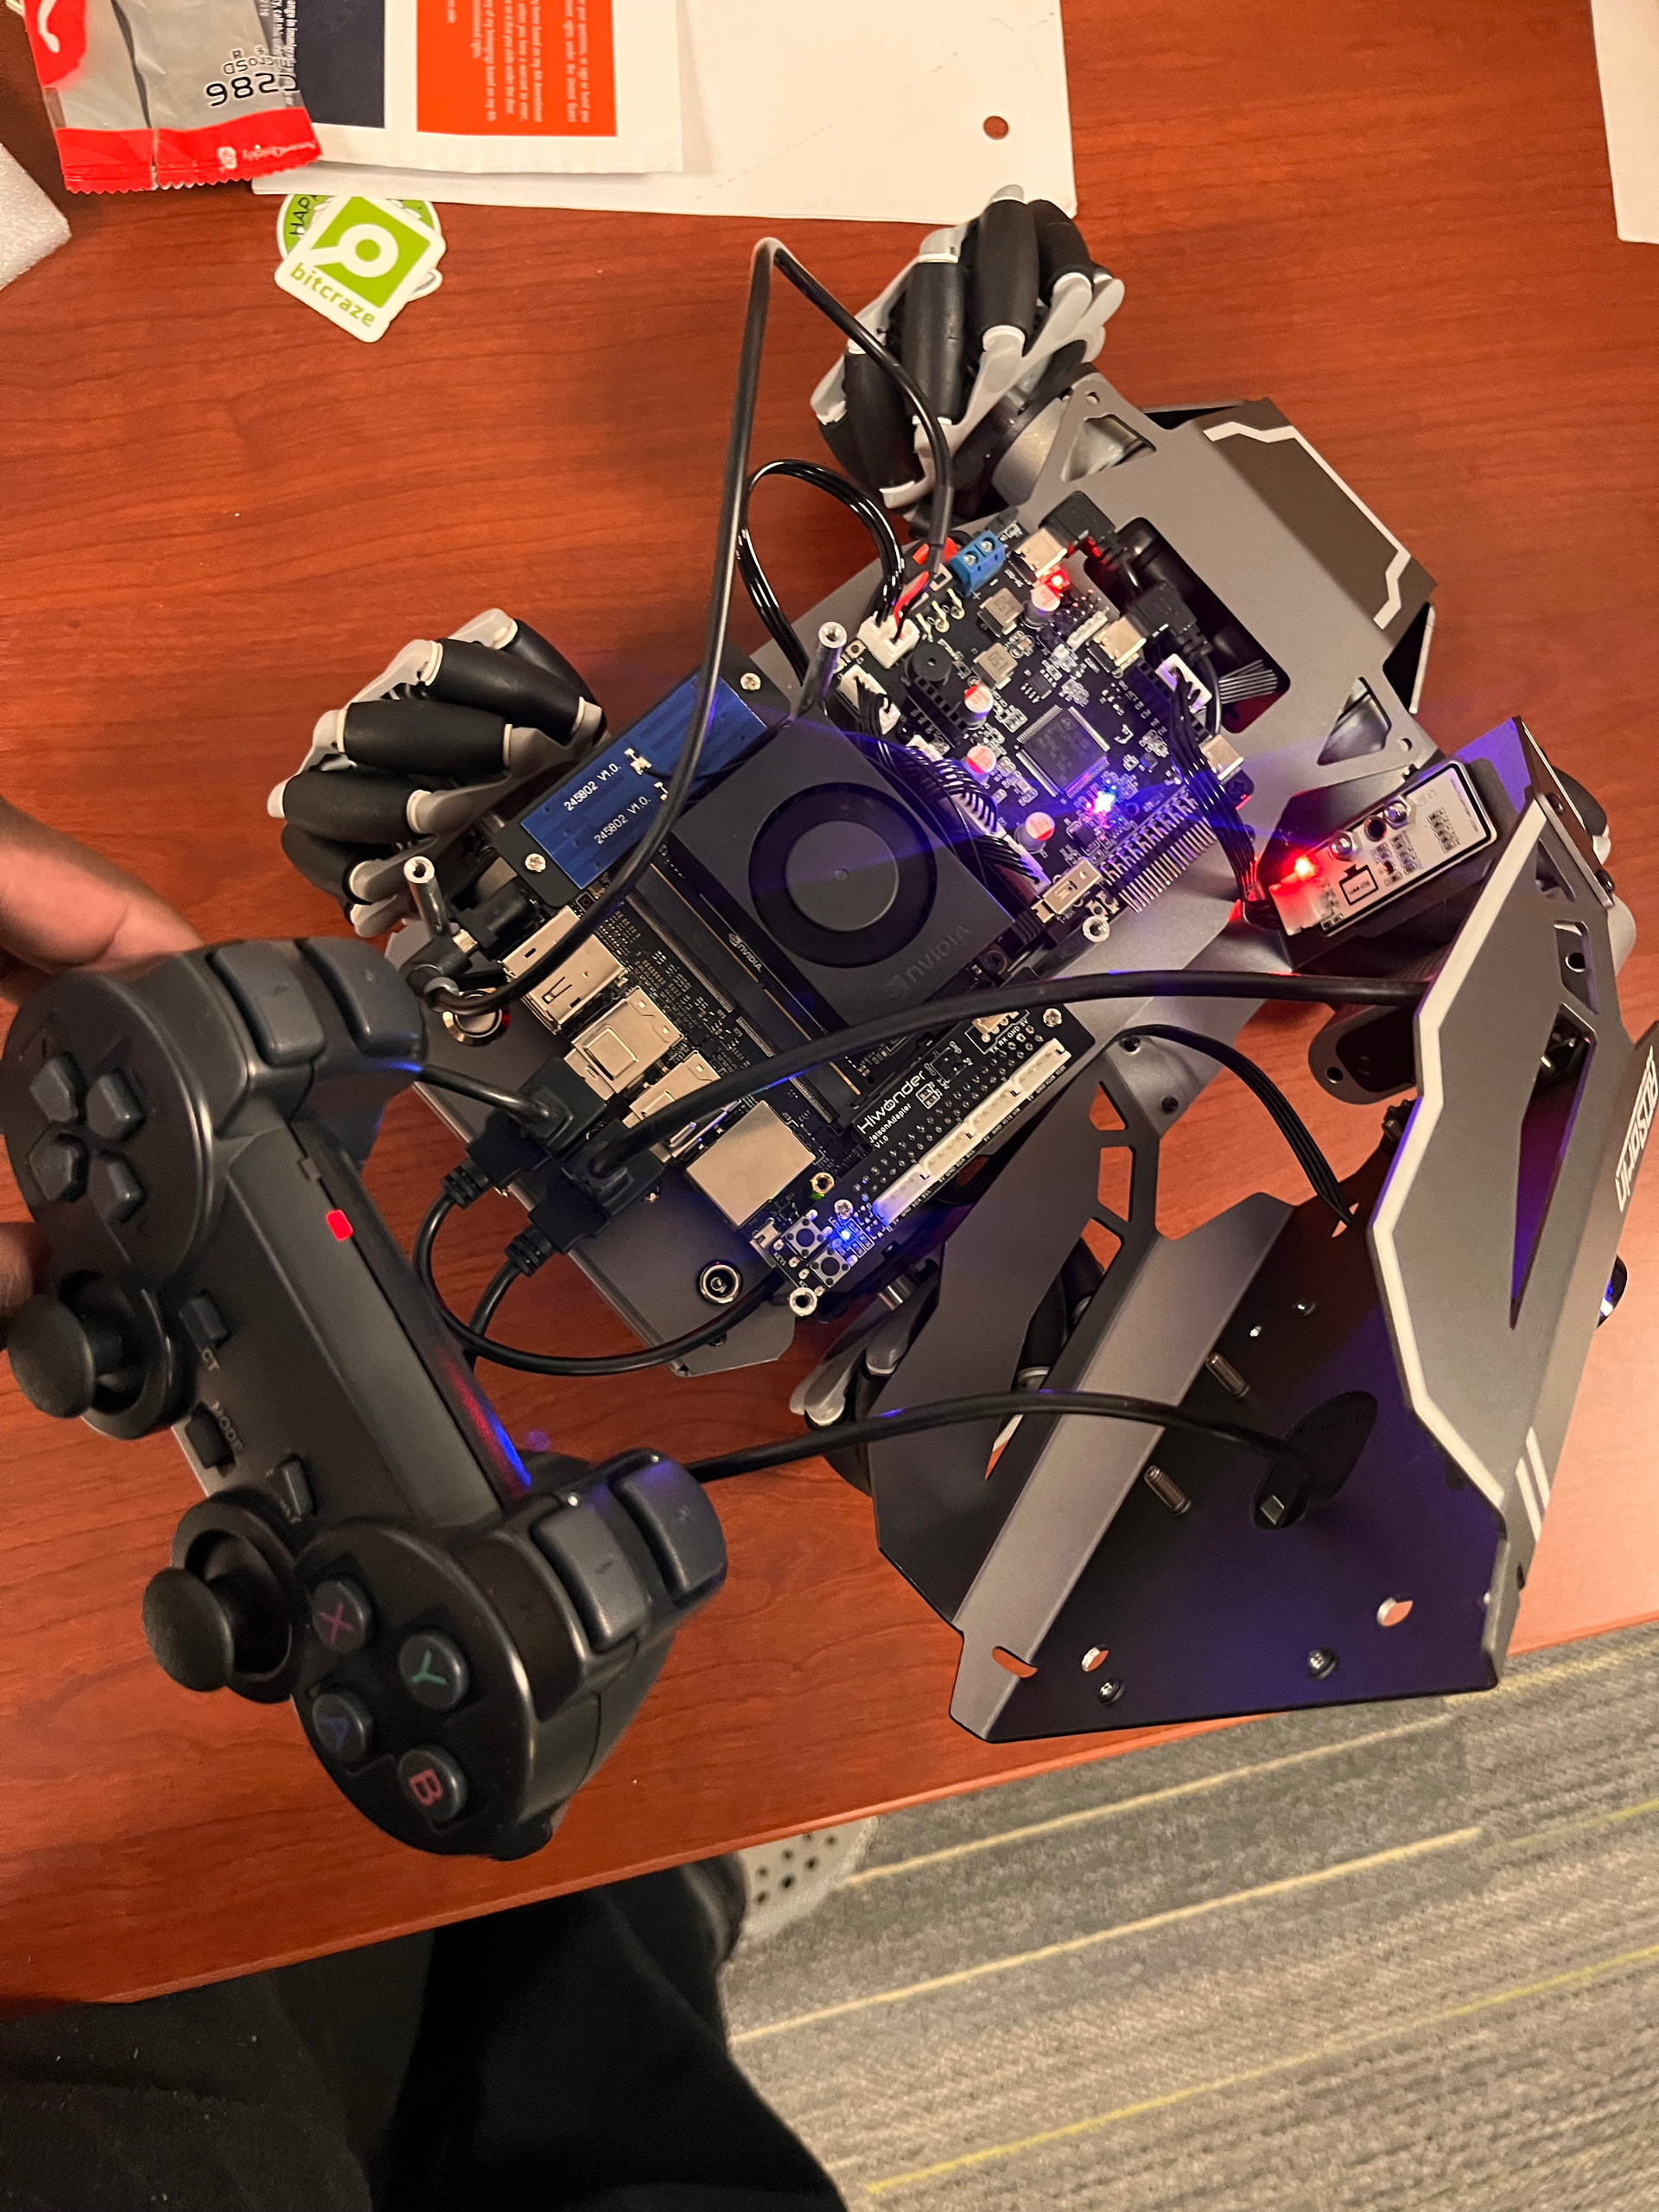
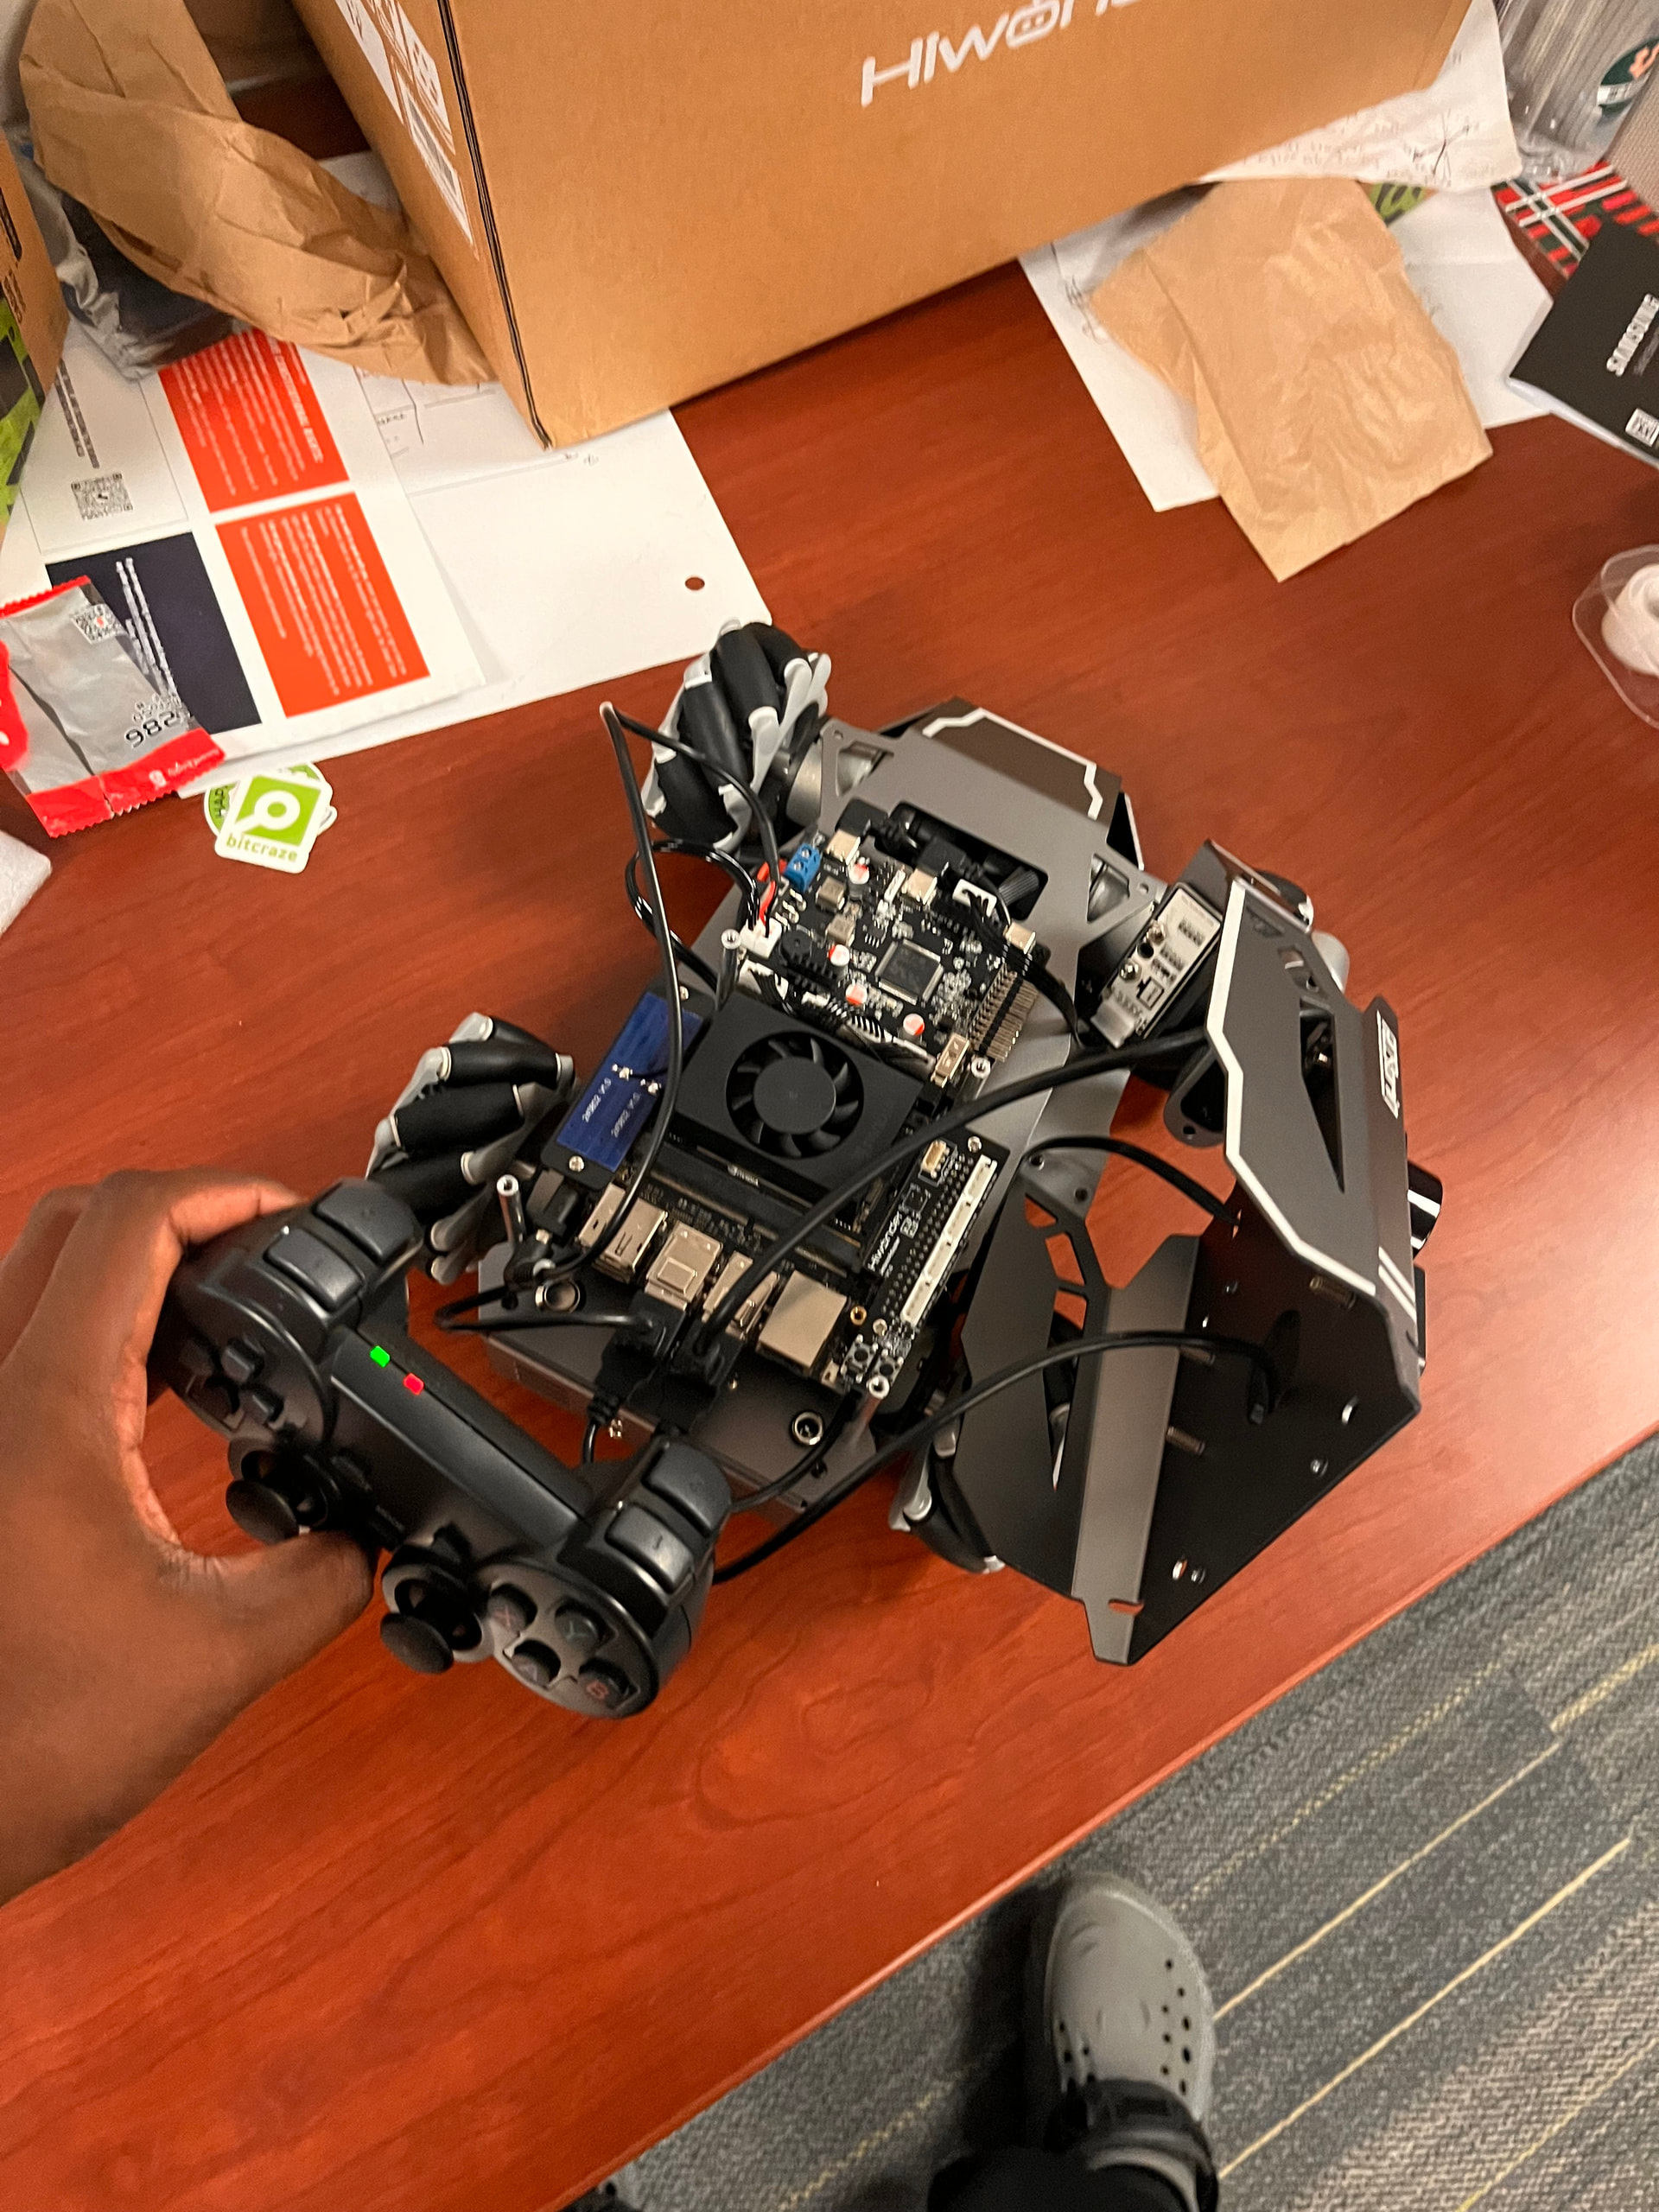
@Hiwonder_Scarlett In the attached images you can see that when i turn the robot on the flashing green and red lights turn red and stop flashing i have circled what i think the USB receiver is but if it is not i have attached a picture of the whole robot too.
Do you know when I will here back from official support about my larger jetson issue?
@Hiwonder_Scarlett Can you reply to my previous message, why is my controller not connecting? is it because it relies on wifi rpoduced by he robot? Also when will the support staff be here I have been having issues for about 2 weeks I do not want to postpone the robot form being able to move any longer
Official support staff are being brought in to help with your Jetson and controller issue. If you still need my help, reply here and @ me. @Hiwonder_Scarlett
We are currently looking into the issue mentioned in your post, investigating the cause, and working on a solution. We will get back to you as soon as possible.