Method for Setting the Servo ID on the ArmPi FPV
1. Introduction
During the operation of the ArmPi FPV robotic arm, if a servo anomaly occurs, such as servo damage requiring replacement with a new one, or accidentally setting all servos to the same ID, the servo ID must be reset. This document introduces how to configure the servo ID via the expansion board.
2. Servo ID Configuration
The specific configuration steps are as follows:
-
Turn on the robotic arm power supply, and connect to the robotic arm via VNC software.
-
Click the icon
 in the system to open the PC software, check the robotic arm ID distribution, and identify the ID number to be configured for the servo.
 -
Turn off the robotic arm power supply, remove the upper cover of the robotic arm, and disconnect the servo wiring on the expansion board.
-
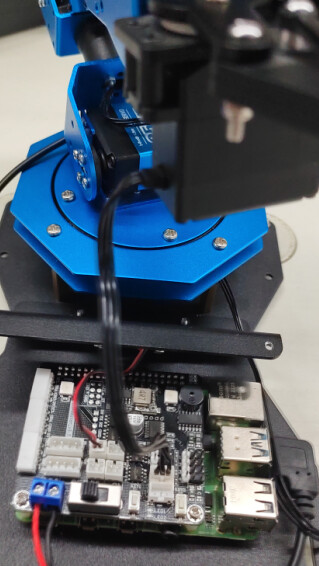
If replacing with a new servo, connect the new servo to the expansion board. If changing the ID due to an incorrect ID setting, disconnect the daisy-chained wiring of the servos, leaving only one servo cable connected to the expansion board. Taking the configuration of the gripper servo ID as an example, the wiring is shown in the figure below:
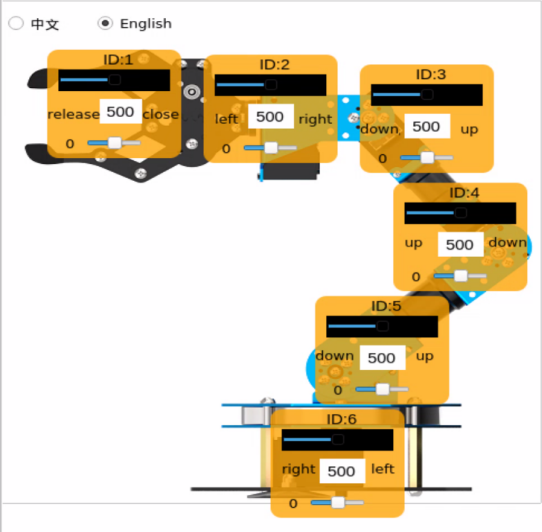
If the cable length is insufficient when configuring other servo IDs, a longer servo cable can be removed from other parts to establish the connection, and the servo can be rotated manually to bring the wiring closer to the expansion board.
-
Turn on the robotic arm power supply again, and connect to the robotic arm via VNC software.
-
Open the terminal, enter
cd software/servo_tool/, then enterpython3 main.pyto open the servo debugging tool. -
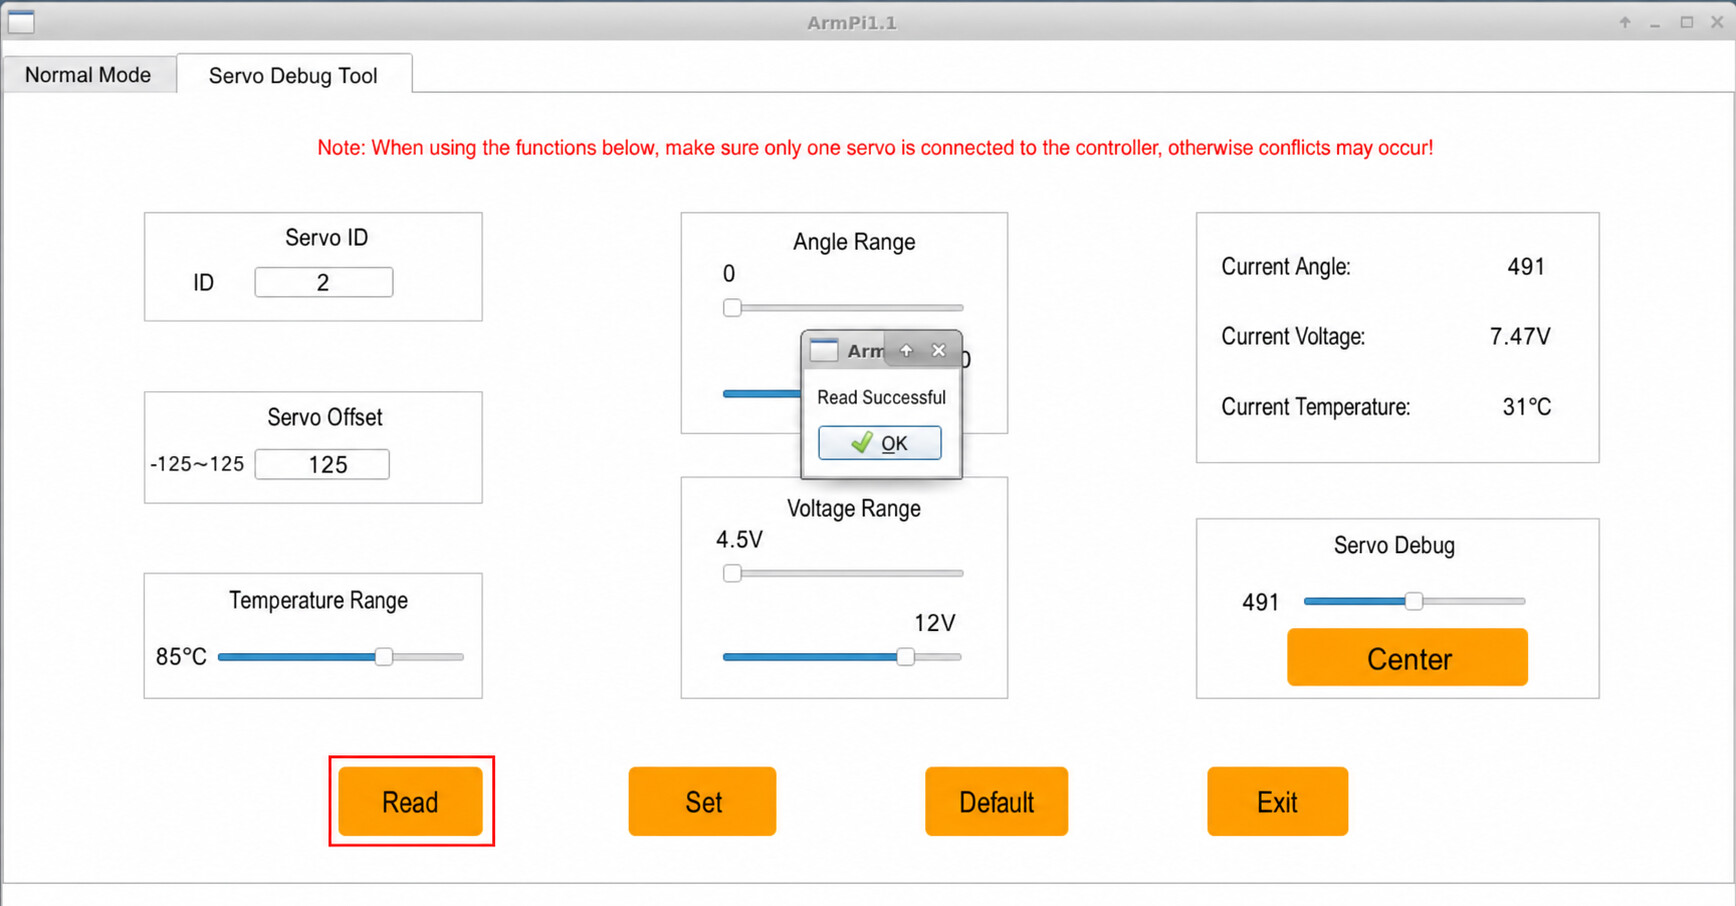
In the menu bar of the Servo Debug Tool, click Read and wait for the Read Successful prompt.
-
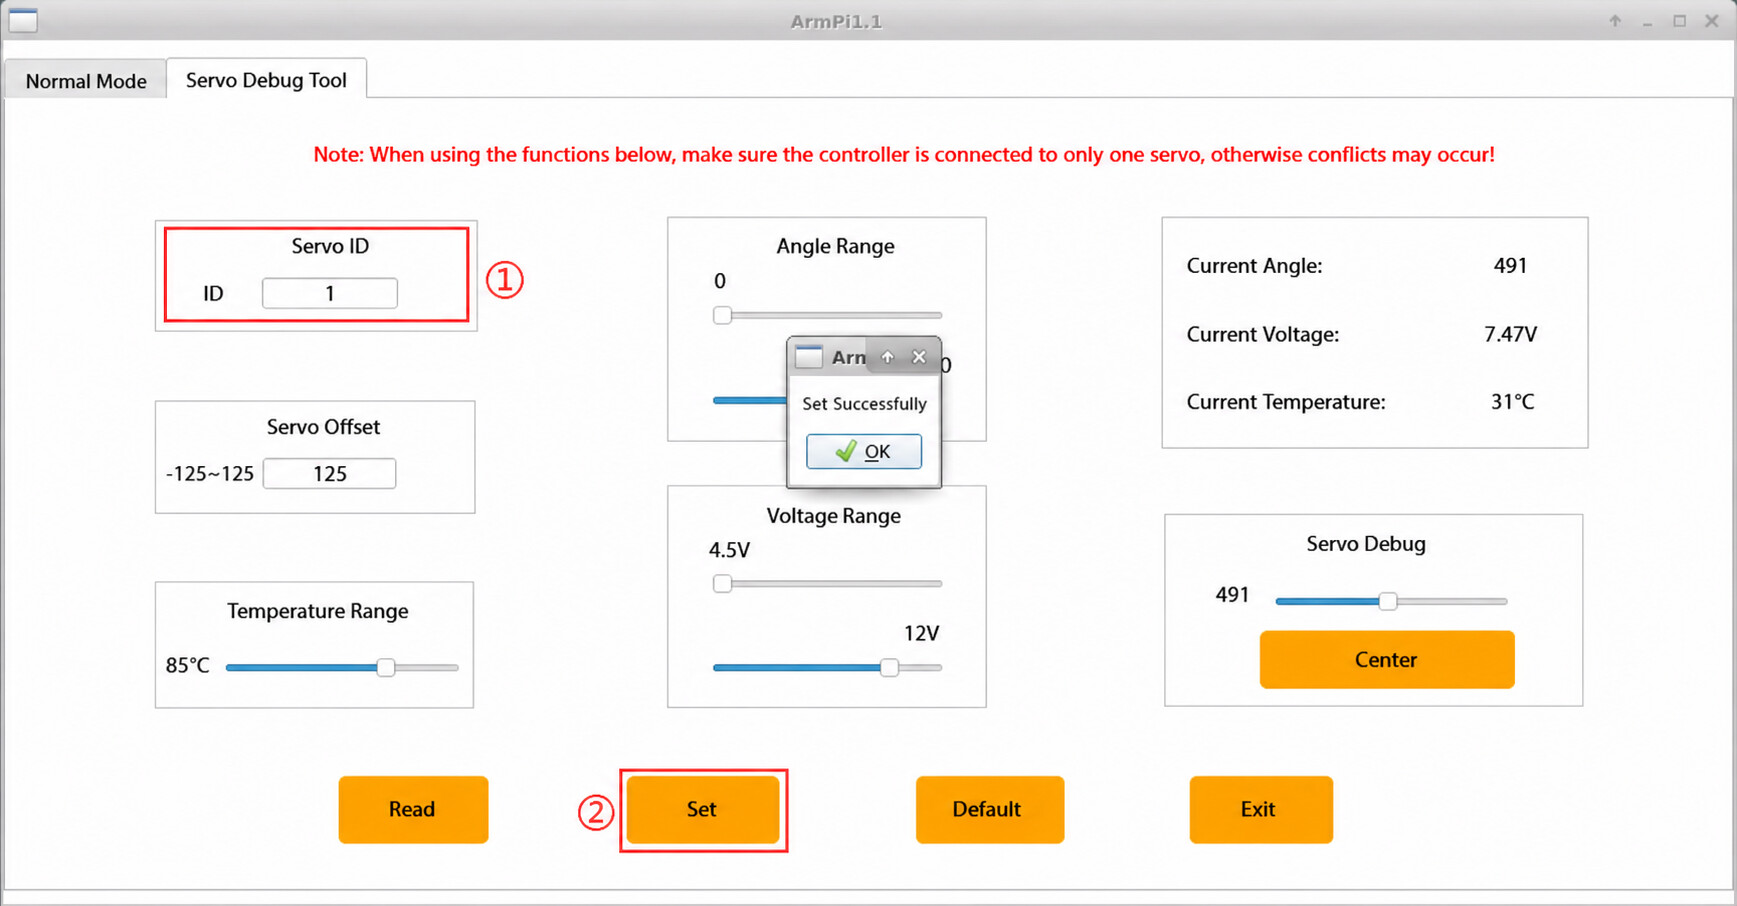
By checking the servo ID distribution, the ID of the gripper servo is identified as 1. In the Servo ID section, select the ID, and input 1 using the keyboard. Click Set, and wait for the Set Successful prompt to complete the process.
-
After configuration, click Read, and verify that the value below Servo ID displays 1, which indicates a successful setting.
3. Tips
After the configuration of the robotic arm servo ID is complete, all wiring must be restored according to the original connection method.